CREATION STATION: COFFEE FILTER BUTTERFLIES

Source: masandpas.com

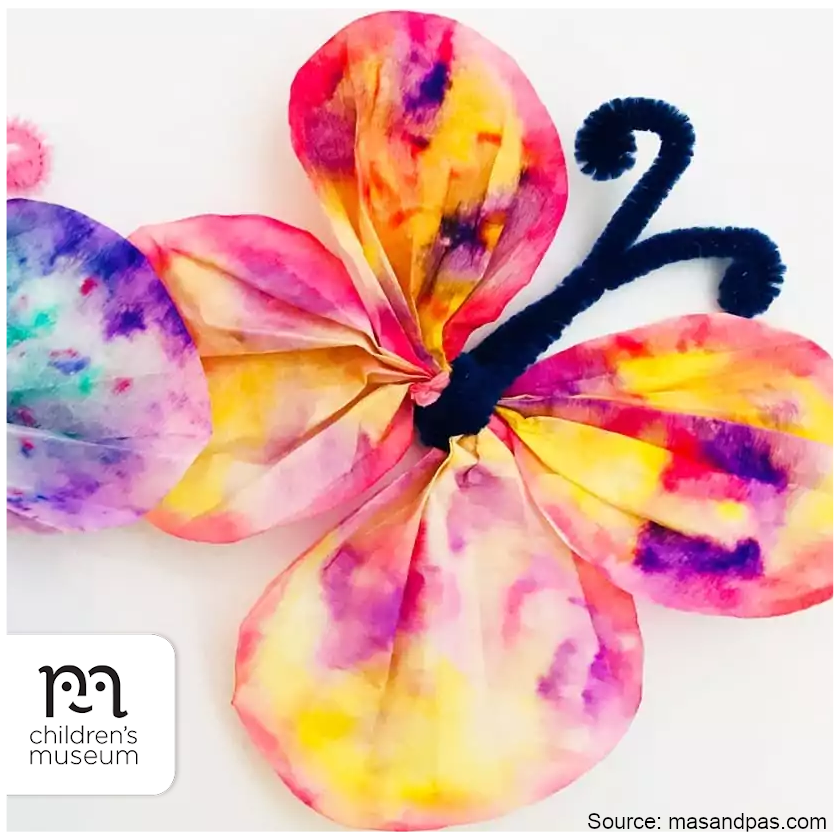
Make a butterfly with this exciting coffee filter and watercolour technique!

Materials

  • Coffee filter papers – you need four circles for each butterfly
  • Washable felt pens
  • Pipe cleaners
  • Pipette/spray bottle/large paintbrush
  • Water

Directions

  • You need four coffee filter circles for your butterfly. Split your circles into two pairs of two coffee filters. Put each circle neatly one on top of the other so that you have two piles of two.
  • Decorate the top coffee filter with washable felt pens. Use nice bright colours and have fun making any patterns you like. Don’t worry if the designs look rough or messy at this stage. They will soon be transformed completely.
  • Place the coffee filter circles on a baking tray. (Take care not to move the undecorated bottom layers.)
  • Now for the exciting bit: drop water all over the surface. You can use a little water bottle pipette or spray bottle or even a fat paintbrush dipped in water. Cover the entire circle with water drops.
  • Then watch the colours start to blend into each other. Once the whole circle is wet, the blank coffee filter underneath will soak up the colours. You should get two matching pairs of coffee filters.
  • Separate the top and bottom layers of each pair. Put the four coffee filters onto a piece of kitchen towel to dry.
  • When they are completely dry, accordion fold each circle. Fold it one way and then another into thin accordion folds. Now you have four folded ‘wings’. Bring the top two wings together by overlapping the folds slightly. Do the same for the bottom pair of wings.
  • To tie the wings together fold a pipe cleaner in half, then wrap it around the centre of the two sets of coffee filters. Twist the pipe cleaner so all that all four pieces are held securely in place. To finish, fan out the four wing parts. Curl the ends of the pipe cleaner around to make the butterfly’s ‘antennae’.

CREATION STATION: GIRAFFE CRAFT


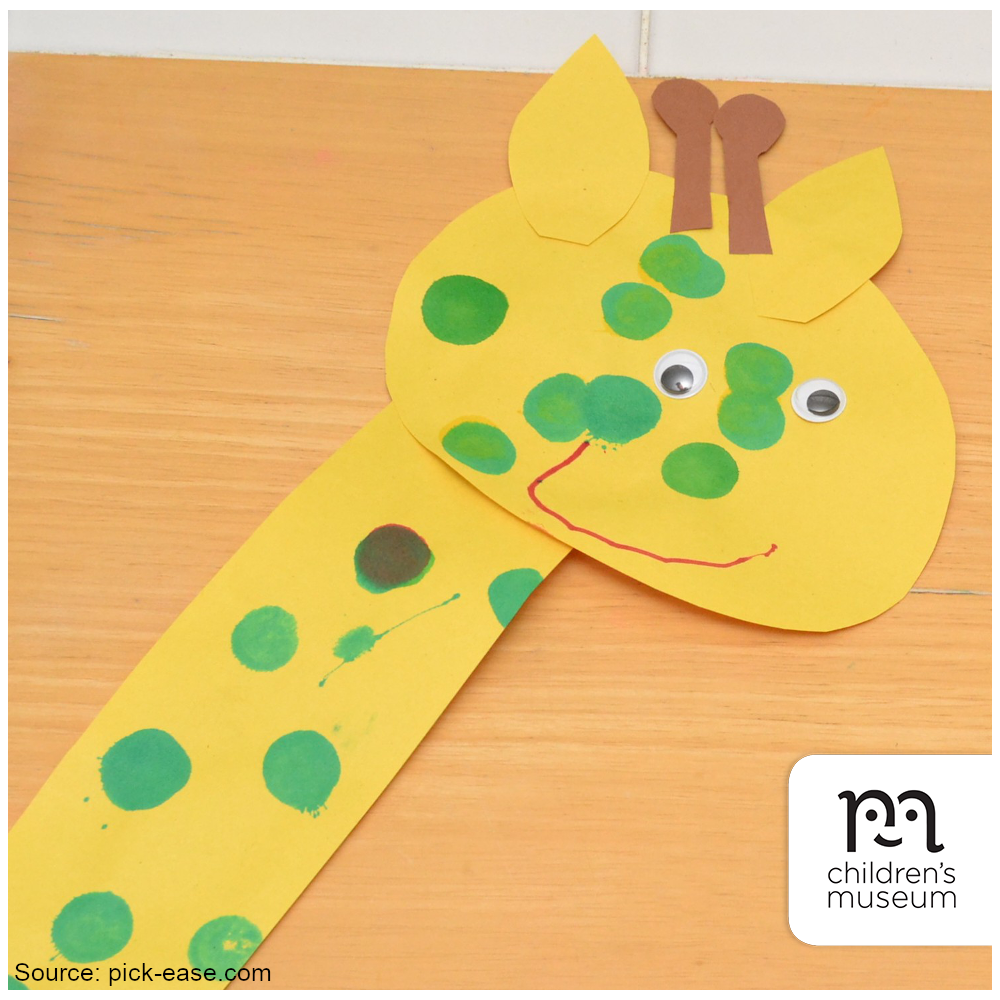
Source: pick-ease.com

Make a simple giraffe craft with your kids! Start by cutting out the individual giraffe shape pieces (pictured here) ahead of time, then have the kids glue the pieces in the appropriate spots to build their giraffe. Once the giraffes are assembled, use markers, bingo dabbers, Do-A-Dot markers, or other drawing tools to make spots! Display on your fridge or continue and make a zoo’s worth of animals.

CREATION STATION: FOUR-LEAF CLOVER CANVAS ACTIVITY


Source: messylittlemonster.com

Display this clover canvas on your wall and brighten up your house, or the kids could give it to someone special as a thoughtful gift.

Materials

  • Q-Tips
  • Green craft paint
  • Paper plates
  • Small blank canvas
  • Green or brown fine tip marker

Directions

  • Gather and layout all of your supplies. Cover the surface you’re working on just to be safe – we’re working with green paint, after all! Start by applying a small amount of green craft paint on the paper plate – it’ll be easier to access it this way.
  • Dip the Q-Tip in the green paint. You can give it a few tries at first, and practice dabbing on the paper plate or a paper towel at first until you get the hang of it. 
  • You want to use the Q-tip as a stamp. Just dab, press and release to create the small leaves of your clover. You can do three or four-leaf clovers (or shamrocks), or both, to have more variety in your design. 
  • Keep creating clusters of little leaves using the Q-Tip as a stamp until you’re happy with your work. Let it dry once you’re done. 
  • To add the finishing touches to your clover canvas, check the paint is dry, and then use a fine tip marker to create a stem for each clover. Just make a quick and fine line below each clover. 
  • You’re done! Now you can display your fabulous painted canvas any way you want to. You could frame it or add a ribbon to hang it up on the wall.  It would also make a great gift to give to someone for St. Patrick’s Day. 

ALL ABOARD: WE’RE GATHERING STEAM


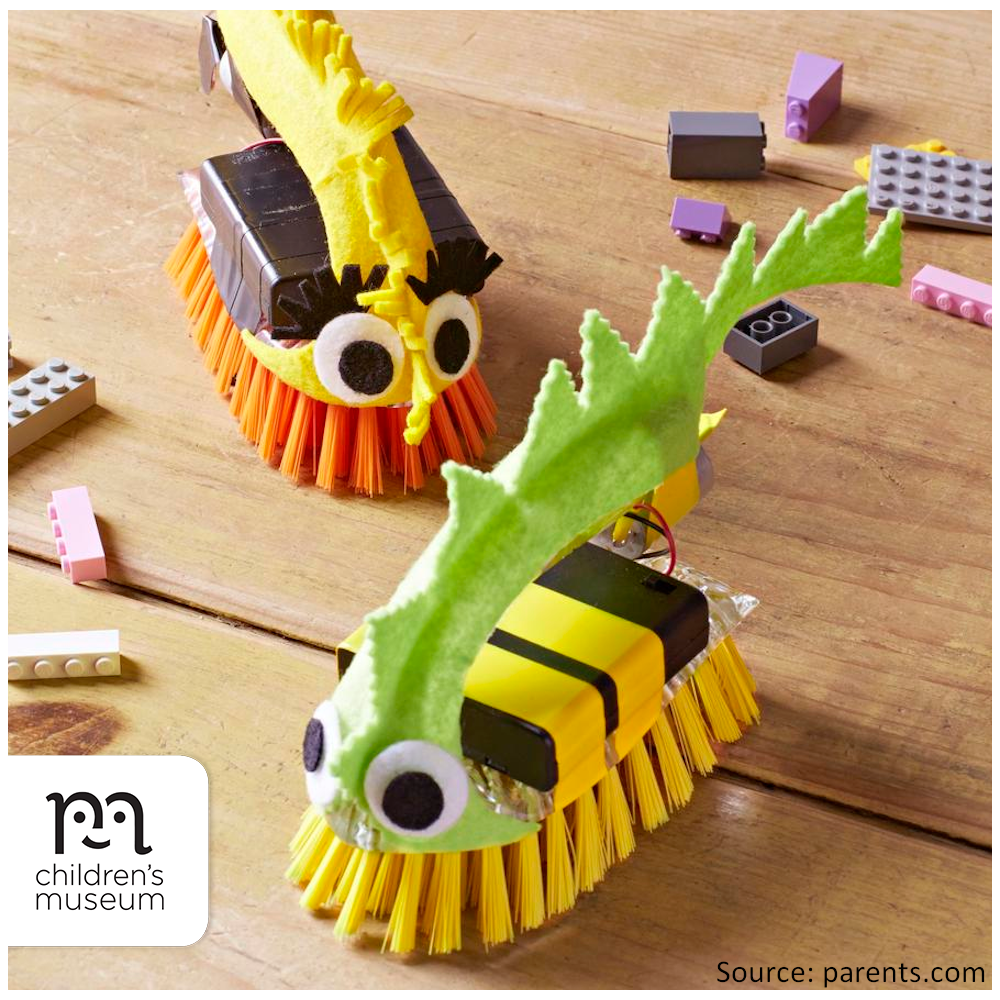
Source: parents.com

This fun and fun-to-build brushbot moves on its own. Just don’t expect it to clean the floors!

Materials

  • Four AA batteries
  • 6-volt battery case with wire lead terminals and an on-off switch
  • 6-volt hobby motor
  • Electrical tape
  • Washer, dime, or other small, flat object
  • Kitchen brush
  • Duct tape
  • Felt
  • Scissors
  • Tacky glue

Directions

  • Put batteries in the battery case. Connect the leads to the hobby motor (it doesn’t matter which colour lead connects to which), and secure the wires in place with electrical tape. Attach the washer to the motor’s shaft with electrical tape.
  • Attach the battery pack and motor to the brush with duct tape, and decorate as desired with felt and duct tape. (Just make sure you can still access the on-off switch!)
  • Turn it on to see it move on its bristle “feet.”

Spark Creative Learning!

This STEAM activity for kids creates a simple circuit, a closed path that an electrical current travels through. The battery provides the electricity, and the wires conduct it to the motor. When the motor’s shaft spins, the washer throws it off-balance, making the whole motor – and the brush along with it – vibrate and move.

CREATION STATION: SKUNK VALENTINE CRAFT


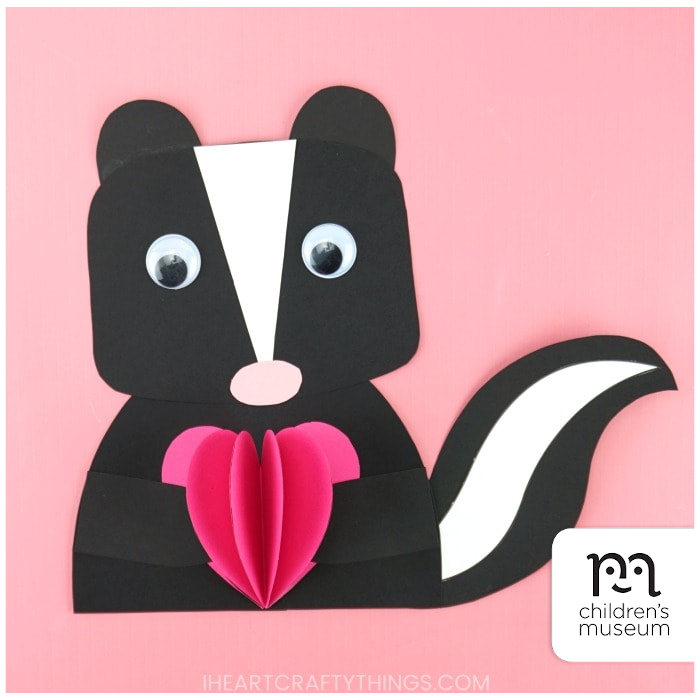
Source: iheartcraftythings.com

A sweet skunk for Valentine’s Day! If you’re making this fun craft with toddlers or preschoolers and feel the 3D heart is too complicated for them to make, simply omit that step and have them glue one single heart on their animal.

Materials

  • Animal valentine templates
  • Coloured cardstock paper or construction paper
  • Large googly eyes
  • Black marker (or crayon)
  • Scissors
  • Glue
  • Pencil for tracing (optional)

Directions

  • Print out the skunk craft template. Cut out each of the pieces from the template and use them as a pattern to trace and cut out each of the pieces on coloured cardstock or construction paper. You can also print out the pieces directly on coloured cardstock, or have children color the pieces with crayons.
  • Create the 3D heart for your animal to hold. Start by folding each of the five hearts in half. Add glue on one folded side of each heart and glue the halves together to create a 3D heart shape.
  • Glue the heart at the bottom of the skunk body. Close the 3D heart and add glue to one side. Open it back up, position it in the center of the body and glue it down in place. Close the heart again to reveal the unglued section. Add glue to it, open the heart again and press the glued section down onto the animal body.
  • Glue the skunk face at the top of the body. Add glue to the back of the white face strip and pink nose and glue them on the skunk face.
  • Glue the ears at the top of the skunk. Glue large googly on your skunk face. Add glue on the back of the white tail stripe and glue it onto the tail. Then glue the tail on the side of the skunk body.
  • Add glue on the back of each of the arms and glue them on the skunk body inside the 3D heart so it looks like the skunk is holding it.

ALL ABOARD: WE’RE GATHERING STEAM


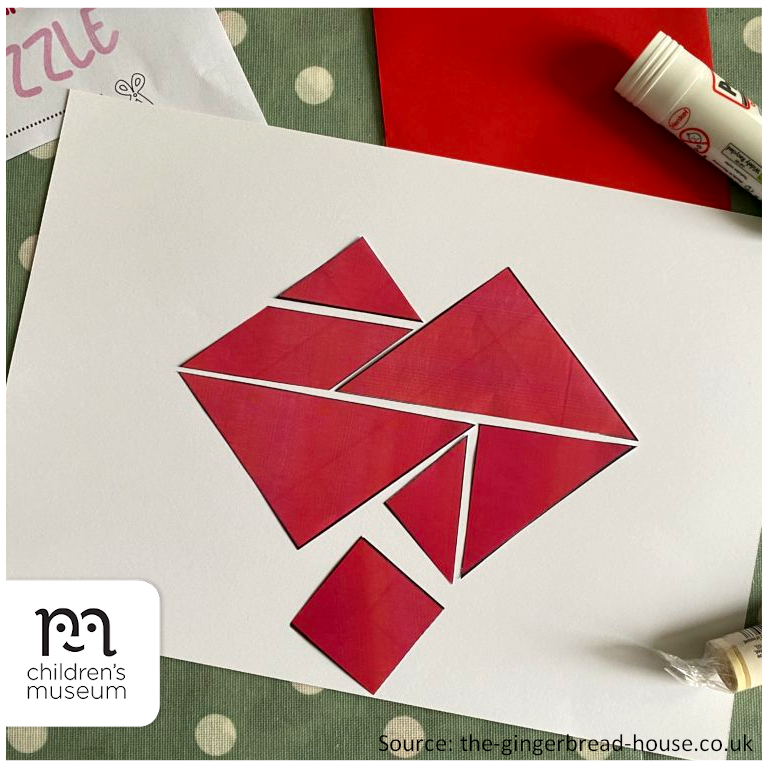
Source: the-gingerbread-house.co.uk

Here’s a heart-shaped tangram inspired by the well-known Chinese puzzles. Turn it into a card for Valentine’s Day!

Materials

  • Valentine tangram puzzle sheet template (available for free download here)
  • Scissors
  • You can easily turn this tangram into a card for Valentine’s Day, in which case, you’ll need some stiff card stock, markers or something for colouring, and a glue stick to do this

Directions

  • Download and print the tangram heart puzzle template. Cut out the seven shapes along the bold lines.
  • Arrange the shapes to form a (angular) heart shape.
  • This fun puzzle activity can also be coloured in and stuck (in its heart shape) onto card stock as a Valentine’s Day card.

Spark Creative Learning!

A tangram is a two-dimensional puzzle of Chinese origin, created by cutting a square into seven pieces. The puzzle consists of one parallelogram, one square, and five different sized triangles. The goal of tangram puzzling is to reproduce various shapes that use all of the pieces with every piece touching and none overlapping. Learn more about tangrams.

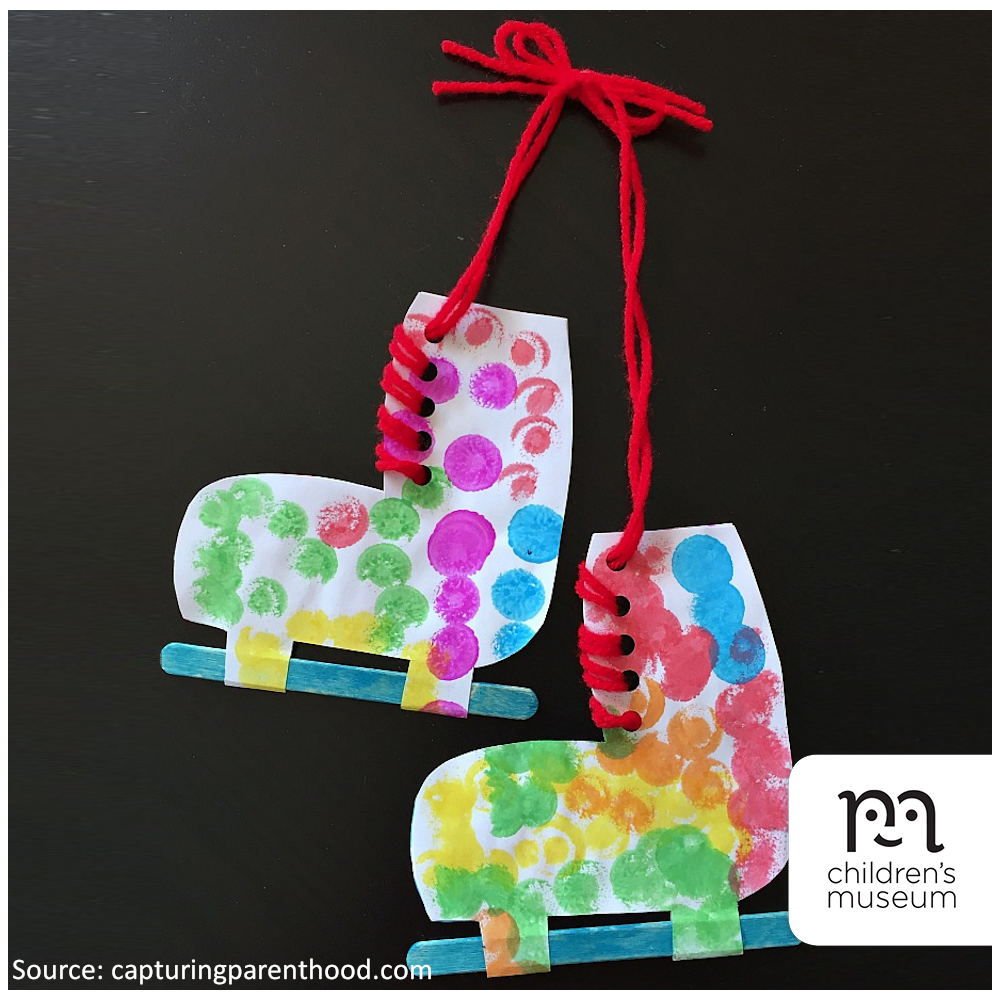
CREATION STATION: PAPER + POPSICLE STICK SKATES


Source: capturingparenthood.com

If it’s too cold to go skating, bring a fun skating activity indoors with this cute, wintery craft!

Materials

  • White paper
  • Markers, bingo dabbers, or other decorating tool of your choice
  • Scissors
  • Two popsicle sticks
  • Glue
  • Hole punch
  • Yarn

Directions

  • Fold a piece of paper in two and cut out a simple boot shape, leaving the two bottom components of each skate attached. (This provides a resting spot for the popsicle stick blades when the paper is folded back together.)
  • Stamp or colour the skate boots however you like! (If your kids are heavy-handed on the dot marker stamping, your paper skates might start rolling up as they dry. Nothing that laying them flat underneath a couple of heavy books can’t fix.)
  • Once the paper is dry, attach the popsicle sticks with a small dab of glue, then proceed by gluing the two interior sides of each paper skate together. Set aside for the glue to dry completely.
  • The final step is to add the laces by simply weaving yarn through a handful of holes created using a single-hole punch. Then you can use the tops of the laces to tie the skates together!

explore more:

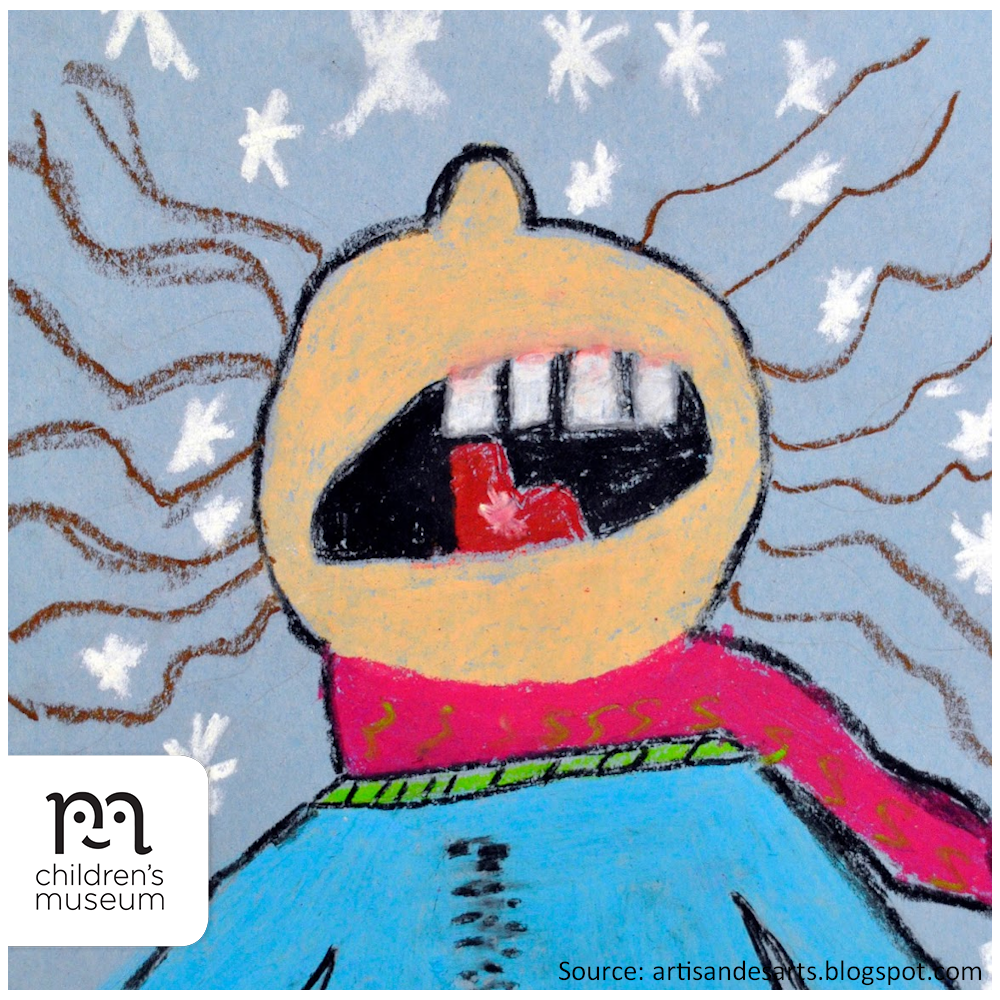
CREATION STATION: CATCHING SNOWFLAKES ON YOUR TONGUE SELF-PORTRAIT


Source: artisandesarts.blogspot.com

This is an incredibly cute idea for a wintery self-portrait with a few different ways to approach it – you could do oil pastel drawings, as pictured above, or use coloured construction paper to cut out and glue all the different parts of each child’s features and winter gear. The square teeth look especially fun from this angle!

Materials

  • Construction paper
  • Oil pastels

Directions

  • Ask kids to think about what they would look like with their heads tilted back and tongues out, catching snowflakes as they fall. What does their hair look like? What direction does their nose point in? How would they draw their scarf or coat?
  • Ask kids to draw themselves from this angle, using a reference like the example above. Don’t forget the snowflake that landed on their tongue!

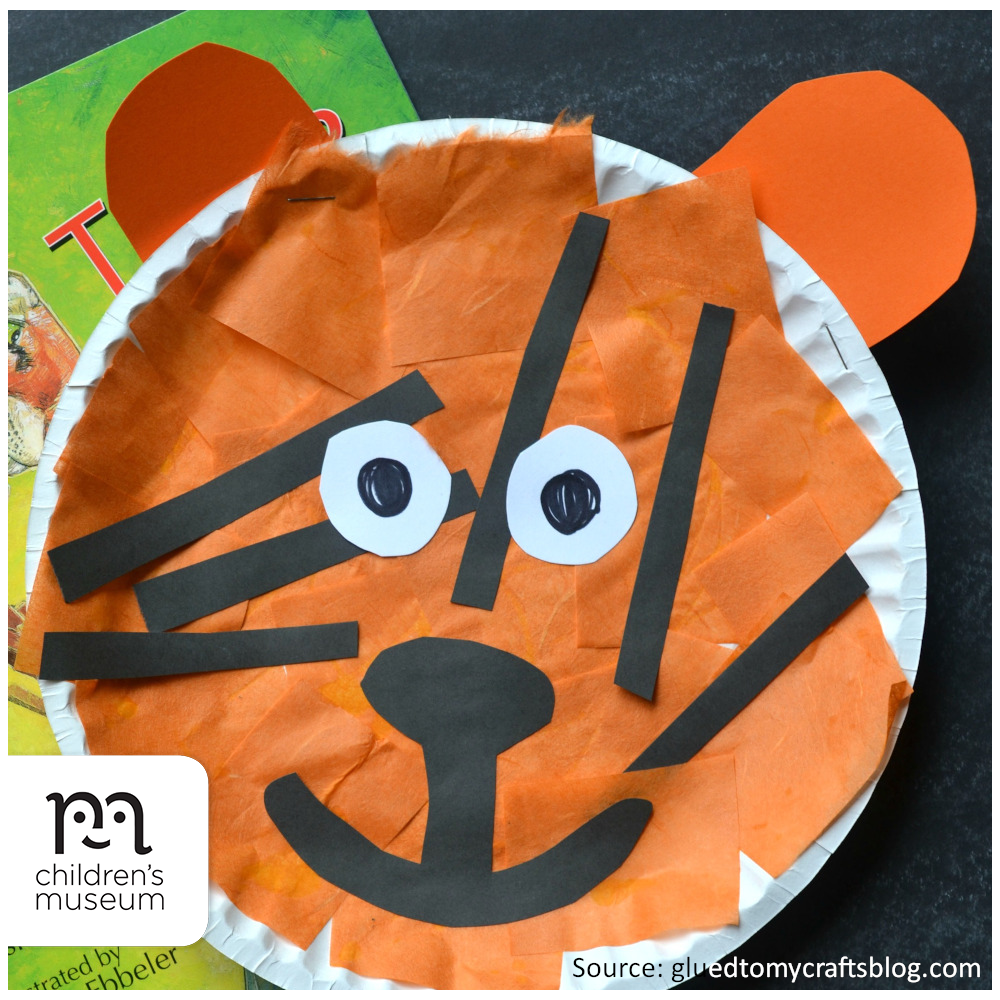
CREATION STATION: PAPER PLATE TIGER


Source: gluedtomycraftsblog.com

This paper plate tiger craft idea is super simple, inexpensive, and fun for all ages.

Materials

  • Large paper plate (one per tiger craft)
  • Orange tissue paper
  • Black/orange/white cardstock paper
  • School glue
  • Craft scissors
  • Black marker

Directions

  • First cut your tissue paper into small squares.
  • Put a good amount of glue all over the paper plate and have your child cover it completely with the orange tissue paper.
  • While they’re doing that, cut out some tiger facial features from your cardstock. Think eyes, ears, nose and small tiger stripes.
  • To finish your paper plate tiger, glue on all the cardstock features to the paper plate. Then allow it to dry completely before you display it proudly for all to see!

explore more:

Kids Playing

SHOP FEATURE 5

(For the week of January 17, 2022) Check out this week’s Feature 5 – a list of top-selling products from Shop, the Children’s Museum’s gift store, now with FREE shipping in Winnipeg on orders over $25! Read More… Sensory Bin – Construction Zone Price: $24.99 each Foster imaginative play with the Construction Zone Sensory Bin.…
Jan 18, 2022 • arts and crafts, creativity for kids, feature 5, Plush, science, shop, Shop Feature 5, Toys
Kids Playing

ALL ABOARD: WE’RE GATHERING STEAM

Source: scienceupfirst.com Thursday, January 27 is National Kids & Vaccines Day! The COVID-19 vaccines approved in Canada are safe, effective, and save lives. Let’s move the needle (pun intended) and promote vaccine confidence to protect the largest unvaccinated cohort of people in Canada: KIDS! Join ScienceUpFirst, Children’s Healthcare Canada, and the Sandbox Project with vaccine…
Jan 20, 2022 • COVID-19, French, French Science, science, STEAM, STEAM resources
Kids Playing

LOVE LOCAL: SPARK CREATIVE LEARNING ONLINE

Source: folklorama.ca In an effort to support the public health orders of the province of Manitoba for the public to stay home and stay safe, Folklorama is pleased to present Folklorama at Home: The Virtual Experience, on now weekly until March 2022. Folklorama’s cultural arts division has launched a series of free virtual programs that…
Jan 21, 2022 • Family fun, folklorama, french culture, french heritage, love local, online activity, Things to do in Manitoba, Things to do in Winnipeg

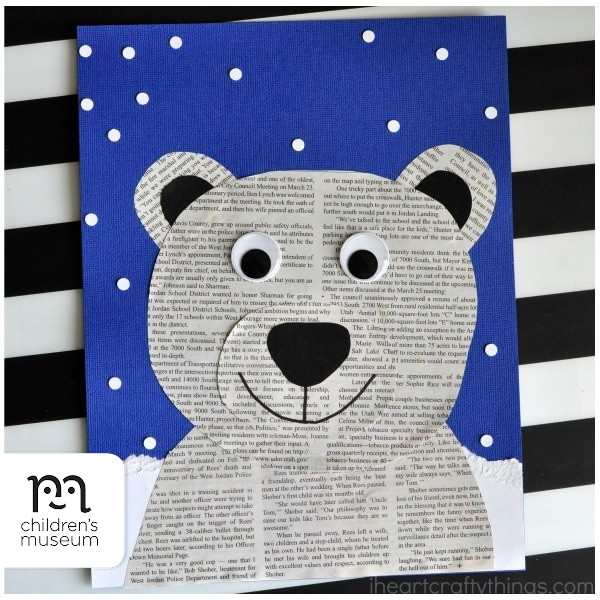
CREATION STATION: NEWSPAPER POLAR BEAR CRAFT


Source: iheartcraftythings.com

Materials

  • Polar bear craft pattern (optional; available at this link)
  • Blue, white, and black cardstock
  • Newspaper
  • Googly eyes
  • Hole punch (optional)
  • Black marker
  • Scissors
  • Glue

Directions

  • Begin by cutting out several pieces from your newspaper to make your polar bear. Start with a large circle for the polar bear head and another half circle for the the polar body body. You will also need two ears and a circle or oval shape for the polar bear muzzle.
  • Cut out two half circles for the ears and an inverted triangle-shaped nose from black cardstock paper.
  • Tear a section off your white cardstock about one-third down the page. You will notice a textured section along the tear of the cardstock that gives great texture to your craft. Add glue to the back of the cardstock and glue it at the bottom of your blue cardstock. This piece will be the snowy background behind your polar bear. (Save the remaining piece of white cardstock to use in a different craft project in the future.)
  • Glue the polar body at the bottom of your page, on top of the snowy background. Then glue the black nose inside the muzzle and the black inside ear pieces onto the ears. Glue the muzzle on the polar bear face and the ears at the top of the polar bear face.
  • Glue the the polar bear face on top of the polar bear body. Now glue on the googly eyes.
  • Draw a mouth on your polar bear with your black marker.
  • Use your hole punch to punch out several white circles. Finish your newspaper polar bear craft by gluing the snowflake-like circles all around your polar bear. (NOTE: If the white circle punches seem daunting, you can also have kids print a fingerprint with white paint around their paper for snow. Using a white crayon to draw on snow is also another simple alternative.)