ALL ABOARD: WE’RE GATHERING STEAM


Source: nationalgeographic.co.uk

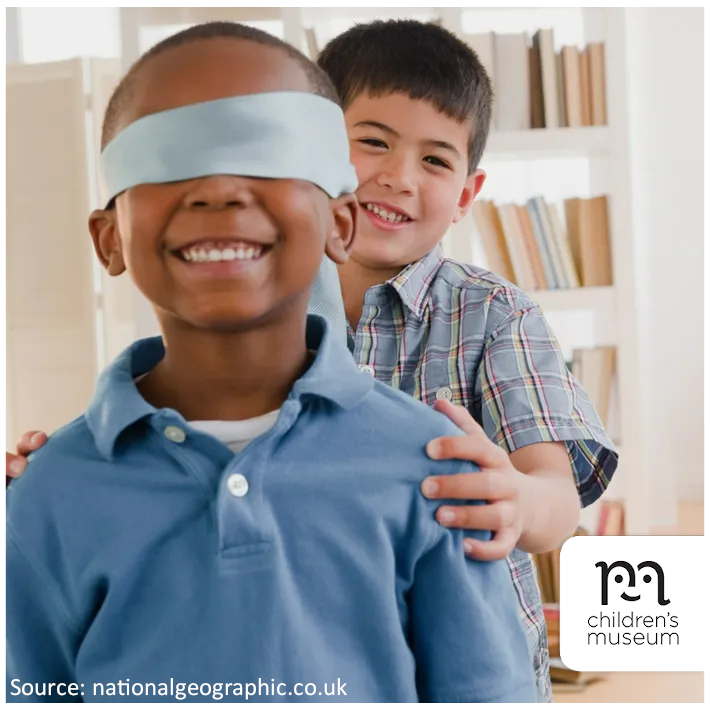
Kids won’t need beakers and microscopes for these four biology experiments – they just need themselves! Each of these experiments from National Geographic’s UK website lets children discover how a human body system works. And by doing these “tests” on their own bodies, they’ll get to see and feel exactly how their own systems function. Learn more and start experimenting.

CREATION STATION: PAPER PLATE TIGER


Source: gluedtomycraftsblog.com

This paper plate tiger craft idea is super simple, inexpensive, and fun for all ages.

Materials

  • Large paper plate (one per tiger craft)
  • Orange tissue paper
  • Black/orange/white cardstock paper
  • School glue
  • Craft scissors
  • Black marker

Directions

  • First cut your tissue paper into small squares.
  • Put a good amount of glue all over the paper plate and have your child cover it completely with the orange tissue paper.
  • While they’re doing that, cut out some tiger facial features from your cardstock. Think eyes, ears, nose and small tiger stripes.
  • To finish your paper plate tiger, glue on all the cardstock features to the paper plate. Then allow it to dry completely before you display it proudly for all to see!

explore more:

Kids Playing

SHOP FEATURE 5

(For the week of January 17, 2022) Check out this week’s Feature 5 – a list of top-selling products from Shop, the Children’s Museum’s gift store, now with FREE shipping in Winnipeg on orders over $25! Read More… Sensory Bin – Construction Zone Price: $24.99 each Foster imaginative play with the Construction Zone Sensory Bin.…
Jan 18, 2022 • arts and crafts, creativity for kids, feature 5, Plush, science, shop, Shop Feature 5, Toys
Kids Playing

ALL ABOARD: WE’RE GATHERING STEAM

Source: scienceupfirst.com Thursday, January 27 is National Kids & Vaccines Day! The COVID-19 vaccines approved in Canada are safe, effective, and save lives. Let’s move the needle (pun intended) and promote vaccine confidence to protect the largest unvaccinated cohort of people in Canada: KIDS! Join ScienceUpFirst, Children’s Healthcare Canada, and the Sandbox Project with vaccine…
Jan 20, 2022 • COVID-19, French, French Science, science, STEAM, STEAM resources
Kids Playing

LOVE LOCAL: SPARK CREATIVE LEARNING ONLINE

Source: folklorama.ca In an effort to support the public health orders of the province of Manitoba for the public to stay home and stay safe, Folklorama is pleased to present Folklorama at Home: The Virtual Experience, on now weekly until March 2022. Folklorama’s cultural arts division has launched a series of free virtual programs that…
Jan 21, 2022 • Family fun, folklorama, french culture, french heritage, love local, online activity, Things to do in Manitoba, Things to do in Winnipeg

CUPCAKE LINER OWLS


Source: Artsy Craftsy Mom

Materials

  • Paper cupcake liners
  • Craft paper sheets in yellow, orange, brown, and blue
  • Googly Eyes
  • Chalk Markers
  • Scissors
  • Glue
  • Leaf embellishments

Directions

  • Start by flattening out the cupcake liners to get circles. Be careful not to tear them.
  • Fold the liners inward from both sides, leaving a narrow gap in the center. The gap should be narrower at the top and wider at the bottom.
  • Make a small fold from the top facing downward. Bring out your chalk markers and go nuts decorating the owls’ wings and tail.
  • What’s this owl missing? A beak! Cut out small triangles from the orange and yellow craft paper for beaks. Then cut out a branch from the brown paper so your owls have a place to sit.
  • Time to put everything together! Attach the googly eyes and beak on the owl’s head. Assemble the branch and leaf embellishments on a blue background and finally fix your owls on the branch.

HALLOWEEN LANTERNS CRAFT


Source: erinspain.com

Give mason jars the seasonal, spooky treatment with some ghost and jack-o’-lantern designs!

Materials

  • Mason jars (you can use an old pickle jar or pasta sauce jar)
  • Tissue paper in your choice of color (green for Frankenstein would be cute too!)
  • Black cardstock or construction paper
  • Mod Podge (or another all-in-one glue/sealer/finish)
  • Sponge brush
  • Scissors
  • LED tealight candles

Directions

  • First, cut your tissue paper to fit around your jar. It’s okay if you overlap the edges, and it’s not necessary to cover the bottom of the jar.
  • Apply a very thin layer of Mod Podge all over your jar with a sponge brush, working quickly since it starts drying quickly. Wrap your tissue paper around the jar, smoothing as much as possible with your hands. Do not expect it to end up smooth – it will be textured. Wrinkles are fine, just press them down as smoothly as you can and try to press out the bubbles.
  • Use your scissors to snip away excess tissue around the rim, and continue to press the tissue down with your fingers.
  • While the Mod Podge is drying (10-15 minutes or so), work on cutting out your black paper to create eyes and a mouth. Dab some Mod Podge on the spots where you want your eyes and mouth to go, and glue them to the lantern.
  • Use your sponge brush to paint on another thin layer of Mod Podge all over your jar, this time on top of the tissue paper and eyes/mouth. Allow it to dry, then screw on the ring part of the lid.
  • Place an LED tealight candle inside to light, and you’re done!

Spark Creative Learning!

Attributes and Characteristics: Did you make a ghost or a jack-o’-lantern design, or something different? Is your lantern making a scary, happy, or sad face?
Fine motor skills: Was it tricky to cut out the mouth and eyes for your lantern?
Sensory awareness: What texture does your jar have before you add Mod Podge and tissue paper? What does it feel like after you apply the tissue paper? How does the light appear through the tissue paper?