ALL ABOARD: WE’RE GATHERING STEAM


Source: modernhomesteadmama.com

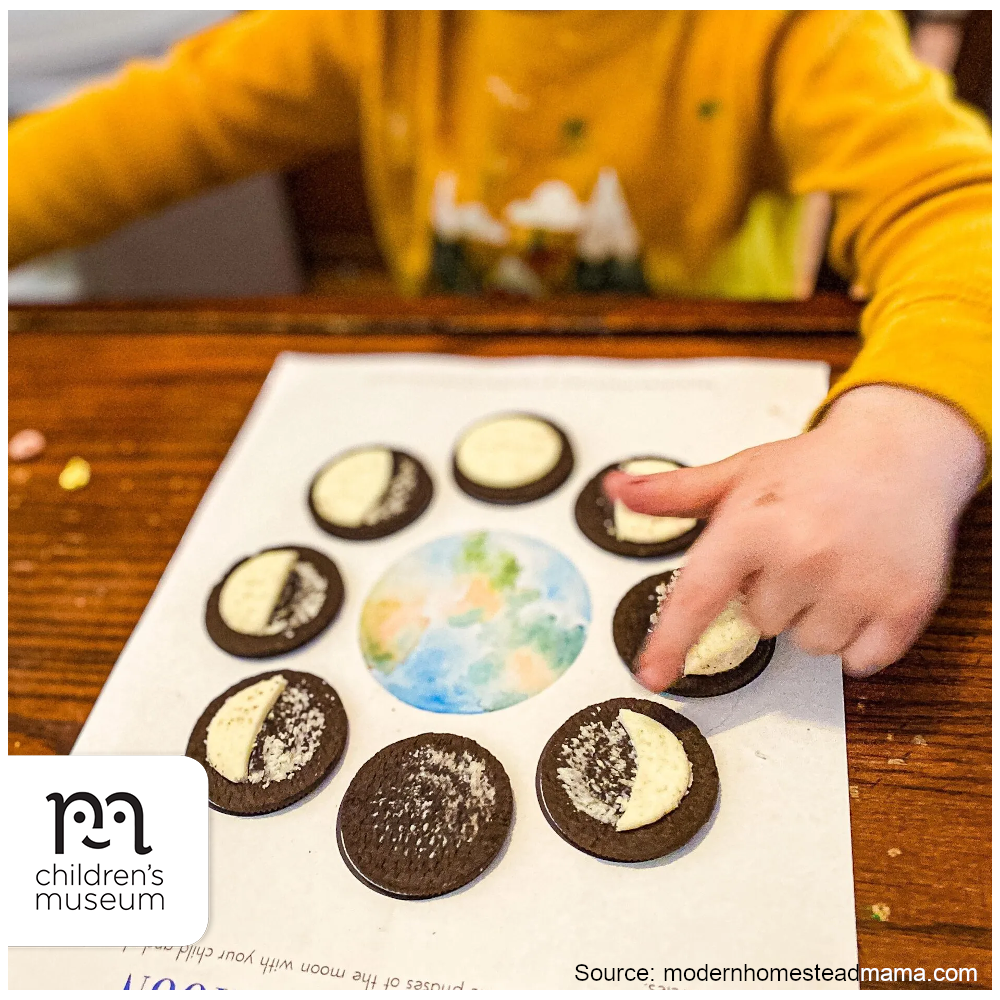
What kid doesn’t love cookies? And oreos make for the perfect little moon replicas. Get a free downloadable phases of the moon worksheet here, and help your kids learn the phases of the moon during snack time.

Beforehand, get kids to study the names and corresponding phases of the moon (at NASA’s Space Place website, for example), and then recreate them from memory with oreo cookies and this handy free downloadable worksheet.

ALL ABOARD: WE’RE GATHERING STEAM


Source: hisawyer.com

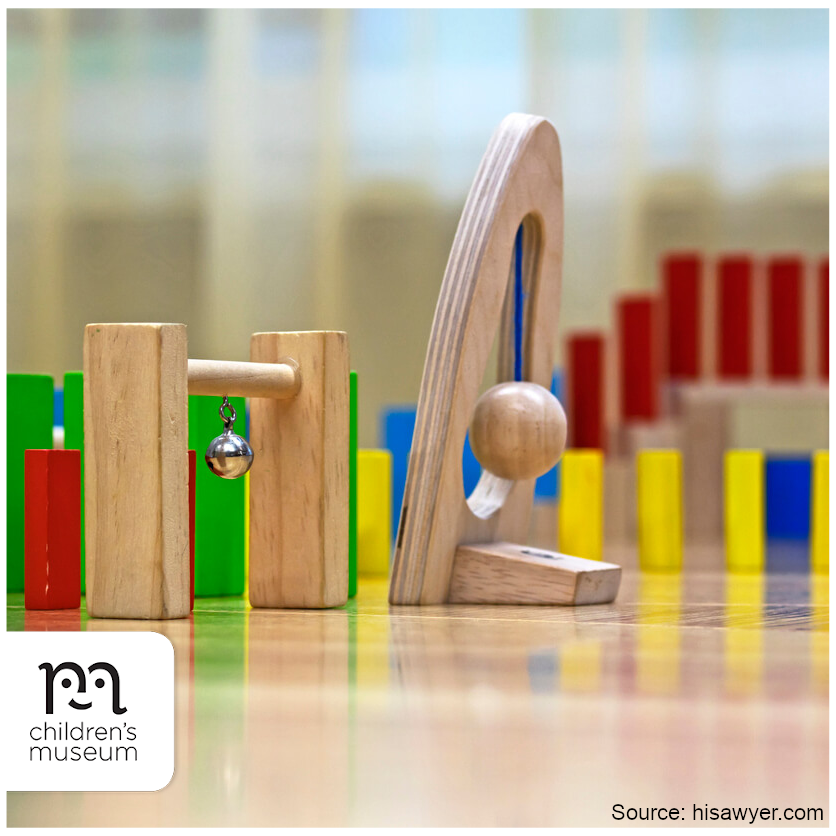
Do yourself a favour: Go on YouTube and look up “Rube Goldberg machine.” You and your child will be treated to videos of hilariously complicated machines built to take care of simple tasks.

Who exactly was Rube Goldberg? He was an American cartoonist who rose to prominence in the first half of the 20th century. Although he was trained and worked as an engineer for a few years, he didn’t actually build the machines for which he became famous – instead, he drew them.

If you want to try making one yourself, you can break down the process of building a simple Rube Goldberg machine into three general steps:

1. Pick a task

What will your Rube Goldberg machine do? Think about small actions you perform every day in your home. Flipping a light switch, shutting a door, dropping something into the trash or recycling, watering a plant—the possibilities are endless.

2. Gather supplies

You can use anything you’ve got lying around the house in your Rube Goldberg machine. That said, there are a few staples you’ll see in most such contraptions: dominoes (or objects that can act as dominoes, like cereal boxes and batteries), marbles (or other things that roll, like balls, cans, and toy cars), string, funnels and chutes (like paper towel and toilet paper tubes), and containers (like cups, bowls, and buckets). You can also experiment with more complicated components like water and magnets.

3. Build part by part

Take the design (sketching your ideas beforehand can be helpful) and construction of your machine piece by piece. Most Rube Goldberg machines are basically a series of unrelated devices that trigger each other one by one, so it makes sense to build in chunks.

Learn more about Rube Goldberg machines and get some building tips.
explore more:

Kids Playing

LOVE LOCAL: SPARK CREATIVE LEARNING ONLINE

Source: nfb.ca In March, the Canadian Museum for Human Rights (CMHR) celebrates la francophonie in partnership with the National Film Board of Canada (NFB). This year, they're celebrating connections that span generations, cultures and communities. The CMHR is proud to present a selection of short films, interactive stories and games with Rendez‐vous de la Francophonie.…
Mar 18, 2022 • Family fun, french culture, french language, love local, national film board, online activity, Things to do in Manitoba, Things to do in Winnipeg
Kids Playing

SHOP FEATURE 5

(For the week of March 21, 2022) Check out this week’s Feature 5 – a list of top-selling products from Shop, the Children’s Museum’s gift store, now with FREE shipping in Winnipeg on orders over $50! Read More… Palm Pals – Sunny Lab Price: $12.99 each Designed to fit perfectly in the palm of your…
Mar 22, 2022 • arts and crafts, feature 5, Games and Puzzles, Plush, shop, Shop Feature 5, Toys
Kids Playing

ALL ABOARD: WE’RE GATHERING STEAM

Source: modernhomesteadmama.com What kid doesn’t love cookies? And oreos make for the perfect little moon replicas. Get a free downloadable phases of the moon worksheet here, and help your kids learn the phases of the moon during snack time. Beforehand, get kids to study the names and corresponding phases of the moon (at NASA's Space…
Mar 24, 2022 • Activities for kids, astronomy, Creative learning, science, STEAM, STEAM activity, STEAM resources

ALL ABOARD: WE’RE GATHERING STEAM


Source: parents.com

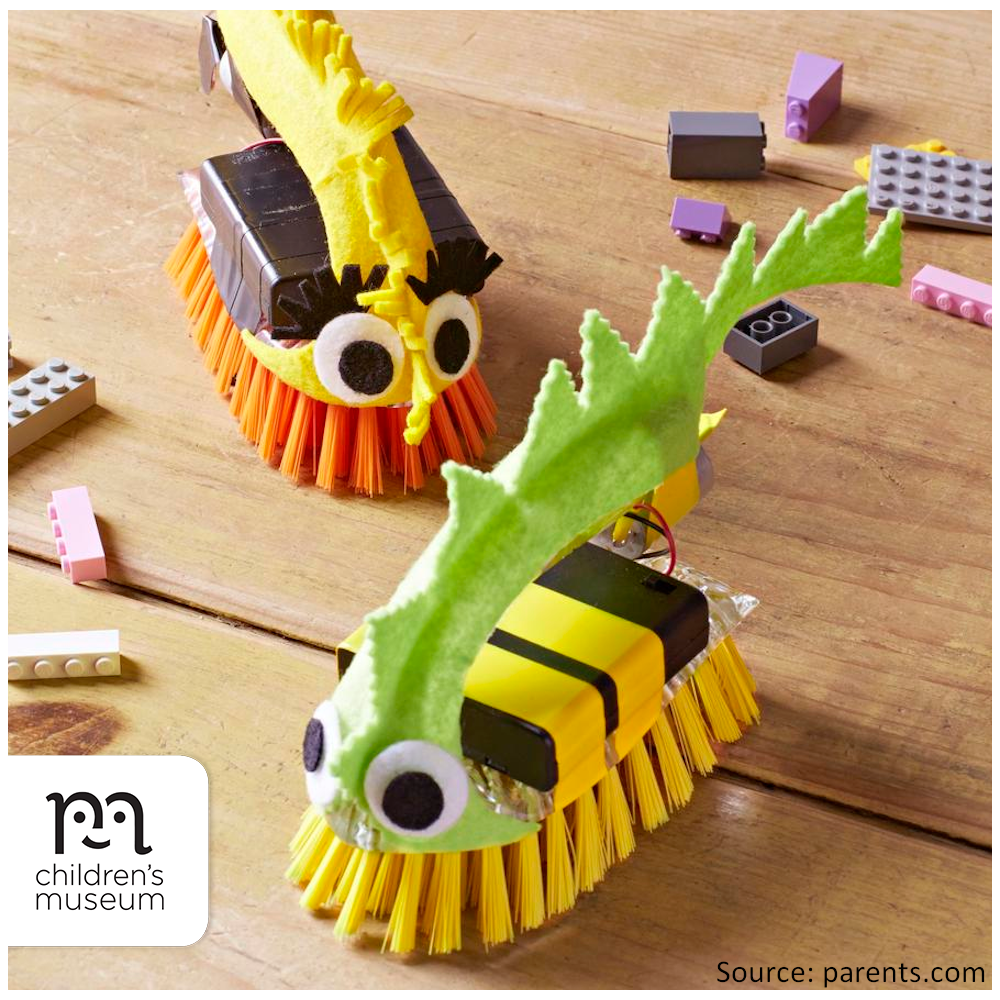
This fun and fun-to-build brushbot moves on its own. Just don’t expect it to clean the floors!

Materials

  • Four AA batteries
  • 6-volt battery case with wire lead terminals and an on-off switch
  • 6-volt hobby motor
  • Electrical tape
  • Washer, dime, or other small, flat object
  • Kitchen brush
  • Duct tape
  • Felt
  • Scissors
  • Tacky glue

Directions

  • Put batteries in the battery case. Connect the leads to the hobby motor (it doesn’t matter which colour lead connects to which), and secure the wires in place with electrical tape. Attach the washer to the motor’s shaft with electrical tape.
  • Attach the battery pack and motor to the brush with duct tape, and decorate as desired with felt and duct tape. (Just make sure you can still access the on-off switch!)
  • Turn it on to see it move on its bristle “feet.”

Spark Creative Learning!

This STEAM activity for kids creates a simple circuit, a closed path that an electrical current travels through. The battery provides the electricity, and the wires conduct it to the motor. When the motor’s shaft spins, the washer throws it off-balance, making the whole motor – and the brush along with it – vibrate and move.

ALL ABOARD: WE’RE GATHERING STEAM


Source: leftbraincraftbrain.com

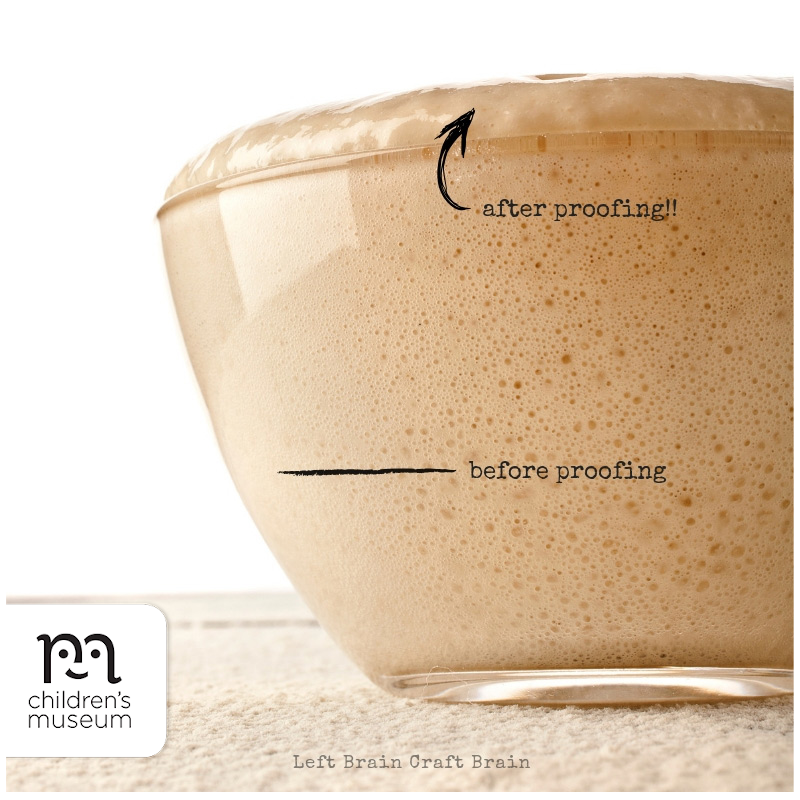
What better way to learn about science than by eating it? Especially if it’s delicious. With this bread-in-a-bag project, kids can learn why bread rises and feel the pride of making homemade bread the whole family will want to eat! You can also do some experimenting to learn more about yeast before you get baking. See the yeast in action by proofing a packet of active dry yeast in warm water! Then, take your knowledge a step further by baking bread and sampling the results. Learn more.

ALL ABOARD: WE’RE GATHERING STEAM


Source: the-gingerbread-house.co.uk

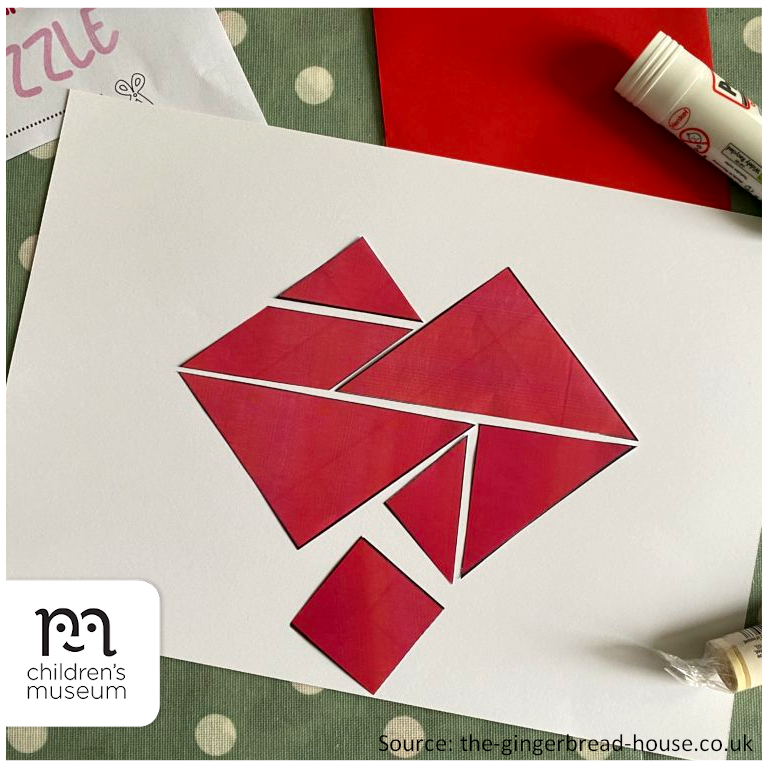
Here’s a heart-shaped tangram inspired by the well-known Chinese puzzles. Turn it into a card for Valentine’s Day!

Materials

  • Valentine tangram puzzle sheet template (available for free download here)
  • Scissors
  • You can easily turn this tangram into a card for Valentine’s Day, in which case, you’ll need some stiff card stock, markers or something for colouring, and a glue stick to do this

Directions

  • Download and print the tangram heart puzzle template. Cut out the seven shapes along the bold lines.
  • Arrange the shapes to form a (angular) heart shape.
  • This fun puzzle activity can also be coloured in and stuck (in its heart shape) onto card stock as a Valentine’s Day card.

Spark Creative Learning!

A tangram is a two-dimensional puzzle of Chinese origin, created by cutting a square into seven pieces. The puzzle consists of one parallelogram, one square, and five different sized triangles. The goal of tangram puzzling is to reproduce various shapes that use all of the pieces with every piece touching and none overlapping. Learn more about tangrams.

ALL ABOARD: WE’RE GATHERING STEAM


Source: kaplanco.com

This DIY robot hand is a simple and inventive engineering activity that will teach children all about the world of robotics! With just three common items – straws, paper, and string – kids can create a moving, bendable hand. This activity encourages exploration of robotics, engineering, and creative thinking.

Materials

  • Standard drinking straws (paper or plastic)
  • Jumbo-sized straws (smoothie straws, paper or plastic)
  • White card stock
  • Scissors
  • Pencils
  • Yarn or string (various colours)
  • Tape

Directions

  • Trace hand (adult hand recommended for larger size) onto card stock. Cut hand outline out with scissors.
  • Place hand back onto paper hand to mark location of joints. Fold the paper hand at the marked joint locations.
  • Cut the standard straws into ¼”, ½”, 1″, and 2 ¼” sizes. Tape standard straws onto hand, and tape the jumbo straw onto the wrist.
  • Using a different yarn colour for each finger, cut five strands of yarn into 2-foot-long pieces. Be sure to knot one end of each piece of yarn. Thread one yarn strand through each finger. Have all colours meet at the wrist.
  • Pull on the strings individually and in combination to explore the wonder of robotic hands!

ALL ABOARD: WE’RE GATHERING STEAM


Source: nationalgeographic.co.uk

Kids won’t need beakers and microscopes for these four biology experiments – they just need themselves! Each of these experiments from National Geographic’s UK website lets children discover how a human body system works. And by doing these “tests” on their own bodies, they’ll get to see and feel exactly how their own systems function. Learn more and start experimenting.

ALL ABOARD: WE’RE GATHERING STEAM


Source: mamapapabubba.com

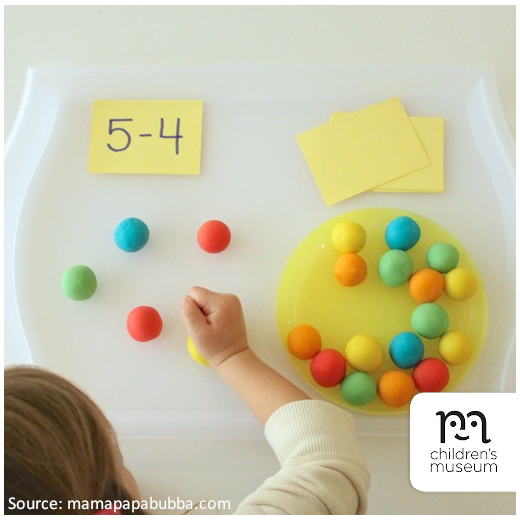
This play dough subtraction smash activity is a fun visual and tactile way for little kids to start learning subtraction!

Materials

  • Play dough, in four or five different colours
  • Cardstock or blank flashcards
  • Scissors (if using cardstock)
  • Marker
  • Plastic tray

Directions

  • Using blank flashcards or cardstock cut into squares, write out some basic subtraction questions using a marker.
  • Then, using different colours of play dough, make a whole bunch of small-ish balls.
  • Set up the play dough balls and equation cards (face down) on a plastic tray.
  • Get your child to start by flipping over an equation card and reading the question on it. Then, they can take the corresponding number of play dough balls and arrange them near the card.
  • Then get your child to “smash” the number of balls needed to complete the equation. Afterward, your child can tell you how many un-smashed dough balls are remaining that now match the equation.
  • Repeat as much as you like!

ALL ABOARD: WE’RE GATHERING STEAM


Source: steampoweredfamily.com

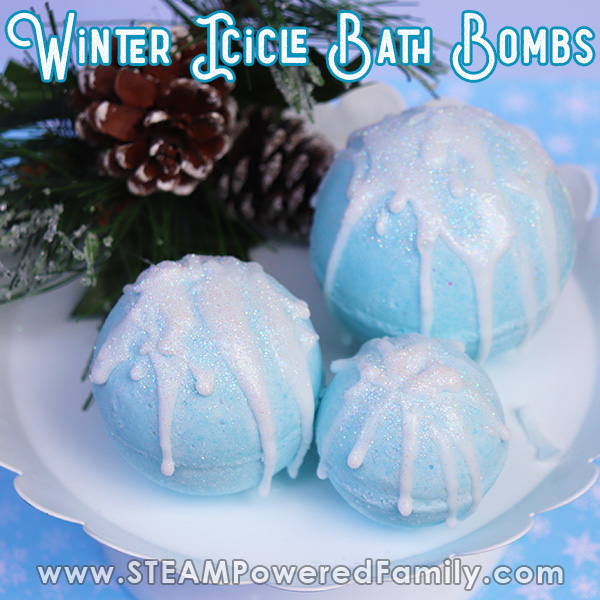
This bath bomb activity is meant to capture the sparkle of freshly-fallen winter snow. With this activity, kids can also study icicles and the way they look and reflect the light and see if they can think of ways to capture that feeling in the design of their bath bombs.

Materials

  • 2 cups baking soda
  • 1 cup citric acid
  • 1/2 cup cornstarch
  • 1/4 cup cream of tartar
  • 1/4 cup fine Epsom salts
  • 1/3 cup coconut oil
  • 1 tablespoon polysorbate 80
  • 10-20 drops helichrysum essential oil
  • 10-20 drops lavender essential oil
  • Light blue coloured mica powder
  • Glitter
  • Bath bomb molds
  • 2-3 cubes of white melt-and-pour soap base
  • Spray bottle filled with rubbing alcohol
  • 1 large mixing bowl
  • 1 small bowl
  • Microwave safe measuring cup
  • Spoon

Directions

  • In a large mixing bowl, add the baking soda, citric acid, cornstarch, cream of tartar and Epsom salts. Mix dry ingredients together.
  • In the measuring cup add the coconut oil. Heat in the microwave for a few seconds until it becomes a liquid.
  • Once melted, add the polysorbate 80, helichrysum essential oil, lavender essential oil, glitter and mica colour powder. Mix together with a spoon, then add to the large mixing bowl.
  • Mix all the ingredients together. I use my hands to break down any lumps and make sure everything is really mixed in there. The mixture is perfect when it holds together as you press it into your hands and feels like wet sand.
  • Take one mold and fill each side with the mixture until it is overflowing a bit. Press both sides together, using a twisting/grinding motion to get rid of any excess mixture. Gently tap each side and carefully remove the bomb. (This takes some technique and practice. Be patient. You can repack and try again as often as you need to until you get the knack of it.)
  • As you progress through making the bath bombs, you may need to spray the mix with rubbing alcohol to moisten it, so they continue to bind together.
  • Allow the bath bombs to dry for a minimum of 24 hours. A rule of thumb is that when they are hard to the touch, they are ready for the final stage: the glaze!
  • Place soap cubes into a microwave safe bowl and melt for 30 seconds and stir. Continue to melt in 30 second intervals until completely melted. You can add some glitter here or wait for the glazing stage.
  • Using a condiment or hair colouring bottle or spoon, drizzle the soap over the bombs to give them the effect of icicles. If sprinkling the glitter, do it before the soap glaze hardens.
  • Let set overnight before wrapping or packing in an airtight container.
  • Give as gifts or keep for yourself!

Using Your Icicle Bath Bombs

To use, simply fill your bath with warm water and plop the bath bomb in! Enjoy the fizzy bath bomb fun! Bath bombs are best used within a couple of weeks. Overtime the strength of the reaction will diminish.

Bath bombs must stay dry until you are ready to use them. They can be wrapped in plastic or placed in an airtight container.

Spark Creative Learning!

Bath bombs are an acid-base chemical reaction. In this recipe we have baking soda as our base and citric acid and cream of tartar as our acids. Cornstarch is a fantastic filler that helps keep our acid and base ingredients dry. This is important, because as any young scientist will tell you, when acids and bases come together, they react, but not when they are in a dry solid state like our bath bombs. To trigger the chemical reaction we need water to make the magic happen.

Another ingredient you may not recognize from the list is polysorbate 80. This is an emulsifier that helps oils mix with water. This is very important in bath bombs, where you want the ingredients to mix in with the bathwater and not float on the top like a layer of scum and stick to the sides of the bathtub. Plus, the science of emulsifiers is pretty cool – finding a way to make fat and water mix is fascinating for young scientists.

ALL ABOARD: WE’RE GATHERING STEAM


Source: playgroundparkbench.com

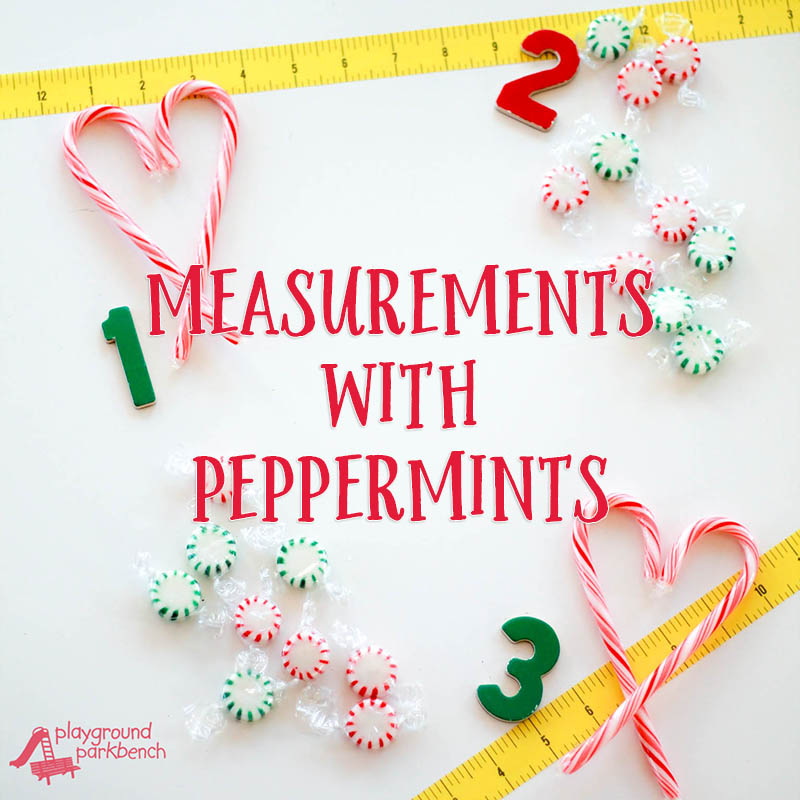
During the holidays, try using peppermints and candy canes as math manipulatives in your family’s projects!

Since birth, children are measured and weighed at every doctor visit. From an early age, they quickly hop on the scale or ask how tall they are. But what does that number mean? And how are different things measured? Typical units of measurement can be a bit abstract for preschool mathematicians, but you can still introduce and explore the concept of measurement with them using more familiar, tangible units. For the holidays, you can explore measurements with candies, using peppermints for weight and candy canes for length.

Weighing Objects with a Balance Scale

If you don’t have a balance scale, you can make a simple DIY balance scale with cups, string, and a coat hanger. Place your scale on a level surface or hang your DIY version from the back of a chair or a hook, and let your preschooler weigh various objects. Instruct them to place an object in one cup, and add weights – in this case peppermints – to the other cup until the scale balances. How many ‘peppermints’ did each of your objects weigh? Which object was the heaviest? Which one was the lightest? Did any objects weigh the same?

Measuring Lengths with Candy Canes

You can also move on to measuring lengths. Using candy canes like rulers, preschoolers can measure countless objects around the room. Demonstrate how to lay the candy cane along the length of the object starting at one end. Lay candy canes end to end to measure the full length of each object. What was the tallest object you measured? What was the smallest?

For Older Kids

Older students can still enjoy these basic measurement activities. You can make it more of a challenge for them by asking them to convert their weights and lengths from units of peppermints and candy canes to actual grams and centimetres!