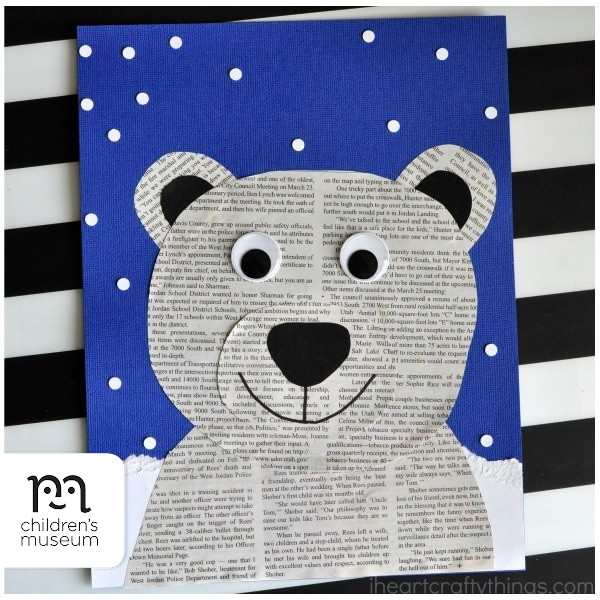
CREATION STATION: NEWSPAPER POLAR BEAR CRAFT

Source: iheartcraftythings.com
Materials
- Polar bear craft pattern (optional; available at this link)
- Blue, white, and black cardstock
- Newspaper
- Googly eyes
- Hole punch (optional)
- Black marker
- Scissors
- Glue
Directions
- Begin by cutting out several pieces from your newspaper to make your polar bear. Start with a large circle for the polar bear head and another half circle for the the polar body body. You will also need two ears and a circle or oval shape for the polar bear muzzle.
- Cut out two half circles for the ears and an inverted triangle-shaped nose from black cardstock paper.
- Tear a section off your white cardstock about one-third down the page. You will notice a textured section along the tear of the cardstock that gives great texture to your craft. Add glue to the back of the cardstock and glue it at the bottom of your blue cardstock. This piece will be the snowy background behind your polar bear. (Save the remaining piece of white cardstock to use in a different craft project in the future.)
- Glue the polar body at the bottom of your page, on top of the snowy background. Then glue the black nose inside the muzzle and the black inside ear pieces onto the ears. Glue the muzzle on the polar bear face and the ears at the top of the polar bear face.
- Glue the the polar bear face on top of the polar bear body. Now glue on the googly eyes.
- Draw a mouth on your polar bear with your black marker.
- Use your hole punch to punch out several white circles. Finish your newspaper polar bear craft by gluing the snowflake-like circles all around your polar bear. (NOTE: If the white circle punches seem daunting, you can also have kids print a fingerprint with white paint around their paper for snow. Using a white crayon to draw on snow is also another simple alternative.)

