ALL ABOARD: WE’RE GATHERING STEAM


Source: kaplanco.com

This DIY robot hand is a simple and inventive engineering activity that will teach children all about the world of robotics! With just three common items – straws, paper, and string – kids can create a moving, bendable hand. This activity encourages exploration of robotics, engineering, and creative thinking.

Materials

  • Standard drinking straws (paper or plastic)
  • Jumbo-sized straws (smoothie straws, paper or plastic)
  • White card stock
  • Scissors
  • Pencils
  • Yarn or string (various colours)
  • Tape

Directions

  • Trace hand (adult hand recommended for larger size) onto card stock. Cut hand outline out with scissors.
  • Place hand back onto paper hand to mark location of joints. Fold the paper hand at the marked joint locations.
  • Cut the standard straws into ¼”, ½”, 1″, and 2 ¼” sizes. Tape standard straws onto hand, and tape the jumbo straw onto the wrist.
  • Using a different yarn colour for each finger, cut five strands of yarn into 2-foot-long pieces. Be sure to knot one end of each piece of yarn. Thread one yarn strand through each finger. Have all colours meet at the wrist.
  • Pull on the strings individually and in combination to explore the wonder of robotic hands!

ALL ABOARD: WE’RE GATHERING STEAM


Source: 123homeschool4me.com

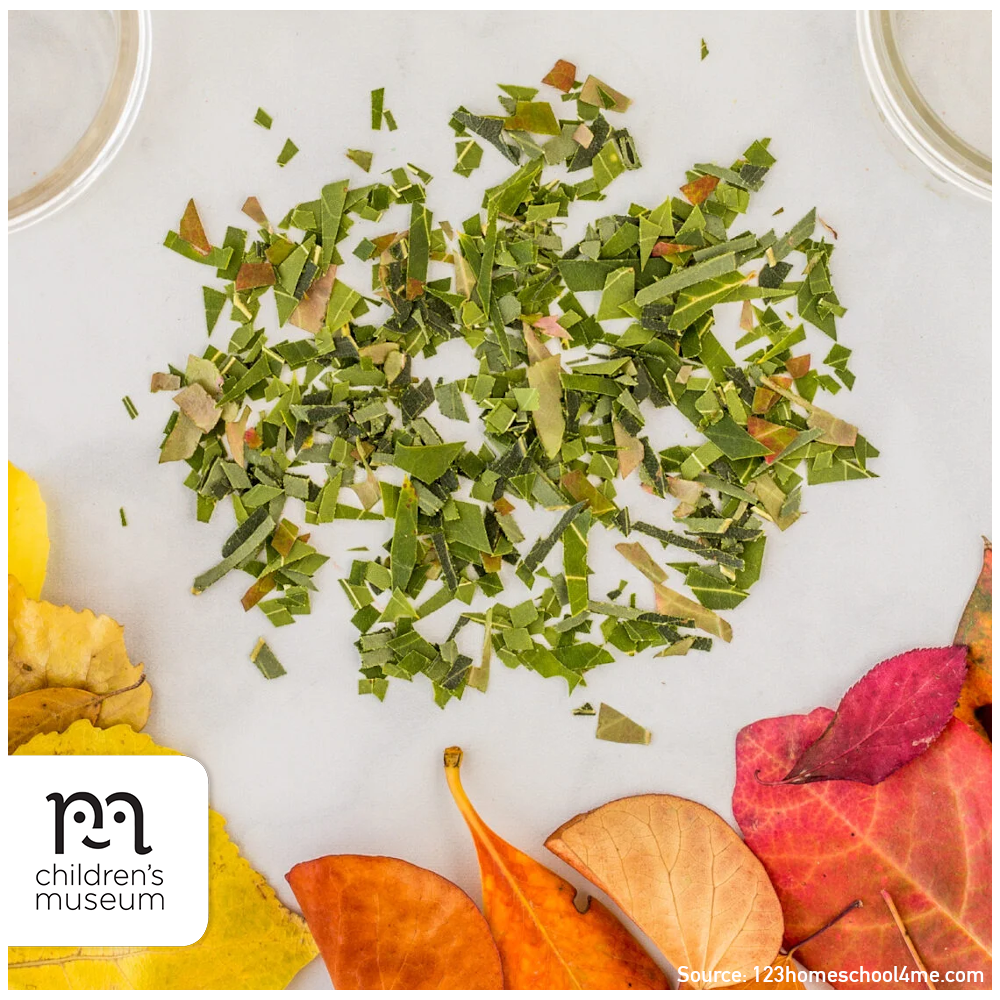
Have you ever wondered why leaves change colour in fall? This fun, engaging, and simple leaf science experiment is perfect for kids ages 4-10.

Materials

  • Mason or other glass jars
  • Coffee filters
  • Leaves
  • Rubbing alcohol
  • Notebook and pencil to record observations

Directions

  • Collect a few handfuls of leaves. You can take a fun nature walk and enjoy collecting leaves on the way. Try to collect a variety of different-coloured leaves.
  • Sort the leaves into containers by colour. They also need to be ground up or torn into relatively small pieces.
  • Put each colour of leafy bits into a glass jar and cover the leaves with rubbing alcohol. The rubbing alcohol should start extracting colour from the leaves.
  • Make a cone shape with the coffee filters and place the pointed tip into the leaf and rubbing alcohol mixture, and allow it to sit long enough to absorb the liquid.
  • You should immediately be able to see the coffee filters absorb the liquid and take a closer look at the different colours. The coffee filters will keep absorbing the leaf-coloured alcohol and then drying out over the next 12 hours. You can describe or sketch the colours you see in a notebook.

Spark Creative Learning!

During winter, the days get shorter, affecting the amount of sunlight the leaves are exposed to. Due to this lack of sunlight, plants go into a resting state and live off of the glucose that they stored over the summer. As they shut down for the winter, the green chlorophyll disappears from the leaves. As the bright green fades away, you can begin to see yellow and orange colours. Small amounts of these colours have been in the leaves all along. For example, in maple trees the bright red that shows up in fall is a result of excess glucose being trapped in the leaves. Learn more.

ALL ABOARD: WE’RE GATHERING STEAM


Source: gosciencekids.com

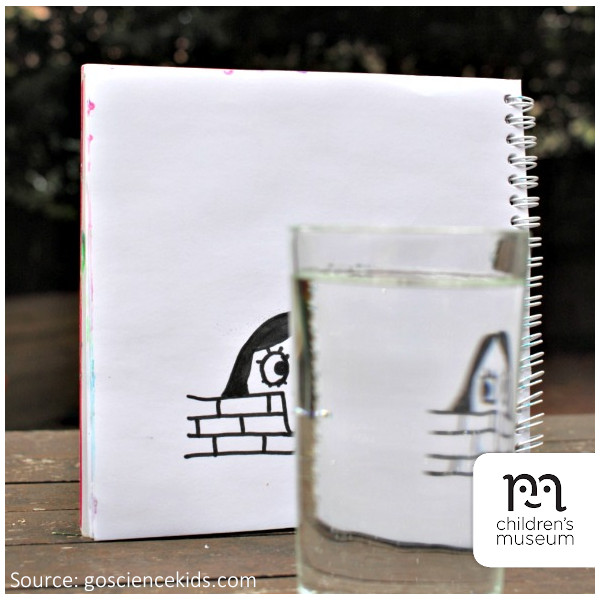
Exploring magical drawings with light refraction is a fun ‘magic’ science trick that even little kids can do. This science experiment is easy to do almost anywhere!

Materials

  • Glass of water
  • Paper (or paper napkin works if you’re at a restaurant)
  • Pen or marker

Directions

  • Draw something on a piece of paper, and see how it looks when you look through a glass of water. You don’t have to limit it to arrows. Be creative! You can draw anything you like and see how it looks through the glass.
  • Questions to ponder: How does your picture change? What bits stay the same? Does image size matter? What happens if you try with a wider (or narrower) glass? What happens if you move the glass closer to the image? Or further away? You could use a ruler to measure the distances and record your results. Does it change if you look at it straight on or slightly from the side?
  • A fun idea is to draw a picture of a face, with the eyes looking one way, and see which way the eyes are looking when you look through the glass.

ALL ABOARD: WE’RE GATHERING STEAM


Source: nypl.org

The New York Public Library offers lots of ways for you to explore STEAM concepts and develop your skills! By having fun with STEAM activities and programs, you’ll learn concepts and gain skills that can set you up for creative, scientific, and collaborative thinking now and in the future. 

Access the New York Public Library’s archive of weekly steam projects on their Vimeo channel, and check out their upcoming virtual programming schedule.

ALL ABOARD: WE’RE GATHERING STEAM


Source: ingenium.org

Explore Ottawa’s Ingenium family of museums – the Canada Agriculture and Food Museum, the Canada Aviation and Space Museum, and the Canada Science and Technology Museum – on their webpage devoted to at-home education. With their wide array of engaging and online resources (perfect for parents, teachers, and students), you can browse online educational programs by museum name or by type.

explore more:

Kids Playing

LOVE LOCAL: SPARK CREATIVE LEARNING IN MANITOBA

Source: sciencerendezvous.ca Science Rendezvous is happening all over the country on May 8, and Manitoba organizations are hosting several activities that teachers and families will want to take part in. Join the University of Manitoba and the University of Winnipeg for virtual Science Chase activities on May 8. Test your knowledge of our diverse Manitoba…
May 06, 2021 • Let’s Talk Science, love local, outdoor activities, spring activities, University of Manitoba, university of winnipeg
Kids Playing

CREATION STATION: TISSUE PAPER FLOWERS

Source: easypeasyandfun.com You can make a wonderful bouquet for mom with this tissue paper flower craft. Materials Bright pink, light pink, and white tissue paper - or whatever colours you want! Scalloped circle cookie cutter Pen or pencil Scissors Wood craft sticks Green craft paint Stapler White school glue Directions Paint each craft stick with…
May 08, 2021 • Activities for kids, at-home crafts, crafts, Creation Station, Mother's Day, spring, spring activities
Kids Playing

SHOP FEATURE 5

(For the week of May 10, 2021) Check out this week’s Feature 5 – a list of top-selling products from Shop, the Children’s Museum’s gift store, now with FREE shipping in Winnipeg on orders over $25! Read More… My Diary Price: $14.99 Record your thoughts, doodles, and dreams inside this beautiful printed diary. Heart lock…
May 10, 2021 • arts and crafts, feature 5, Games and Puzzles, shop, Shop Feature 5, Toys

ALL ABOARD: WE’RE GATHERING STEAM


Source: littlebinsforlittlehands.com

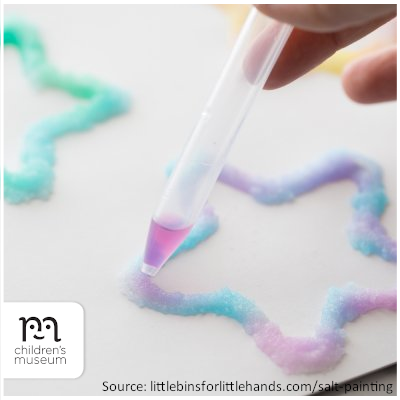
Learn about the unique properties of salt as you make paintings using this household item!

Materials

  • PVA school glue or craft glue
  • Salt
  • Food colouring of your choice
  • Water
  • White card-stock or watercolor paper
  • Template for the shapes you’ll be painting

Directions

  • Trace your template onto cardstock.
  • Add glue to outline your shapes. Then add a good amount of salt onto the glue and carefully pour the excess off.
  • Let the glue (and salt) dry.
  • Mix a few tablespoons of water with your choice of food colouring to make your watercolour paint. Use a pipette to slowly drip the watercolour mixture onto the salt. Try not to drench the patterns but rather watch the salt soak up one droplet of colur at a time.
  • Leave your salt painting to dry overnight, then display it in your home.

Spark Creative Learning!

  •  Notice how the water is absorbed and slowly moves throughout the pattern. You can even add drops of different colours and see what happens!
  • Salt is a really useful product that has the ability to absorb moisture from its environment. Its ability to absorb water is what makes salt a good preservative. This property of absorption is called hygroscopy. Hygroscopic materials absorb both liquid water (the watercolour paint mixture) and water vapour in the air, creating a dehydrating effect.

ALL ABOARD: WE’RE GATHERING STEAM


Source: Science World

Vancouver’s Science World has tons of cool activities and experiments on their resources page for you to try out at home. Balance a pencil on your finger and learn about the physics behind it, check out an optical illusion with this Benham’s Disk experiment, make gooey worms and learn about polymerization, and more! Easily print out any of their activities so you can try these experiments with your family at home.

explore more:

Kids Playing

LOVE LOCAL: SPARK CREATIVE LEARNING IN WINNIPEG…AND BEYOND

Source: greenactioncentre.ca This Earth Day (April 22), check out Green Action Centre's list of 51 green actions to help you celebrate and reduce your eco footprint. Here's a sample of some of the things you can do: Get your bike ready for spring! Check out some tune-up tutorials here. Check out community supported agriculture in…
Apr 21, 2021 • Creative learning, earth day, love local, outdoor activities, Things to do in Manitoba, Things to do in Winnipeg
Kids Playing

Support McNally Robinson on Canadian Independent Bookstore Day, April 24

In celebration of Canadian Independent Bookstore Day on April 24, the Canadian Independent Booksellers Association (CIBA) is running an online contest across Canada with a chance to win some fantastic prizes. Support Winnipeg's McNally Robinson Booksellers by participating in the contest! It's simple: Buy books. You may shop online, by phone, or in-store with McNally…
Apr 23, 2021 • books, contest, mcnally robinson booksellers
Kids Playing

CREATION STATION: FLOWER NECKLACE

Source: homeschoolantics.com Make a flower necklace to wear to your next party! Materials Drinking straws Yarn Construction paper in a variety of colours Scissors or flower-shaped paper puncher Hole puncher Directions Cut out flowers from the construction paper either with a flower-shaped paper puncher, freehand, or by tracing flower shapes and then cutting them out…
Apr 25, 2021 • Activities for kids, at-home crafts, craft, Creation Station, spring, spring activities

ALL ABOARD: WE’RE GATHERING STEAM


Source: littlebinsforlittlehands.com

It’s simple to make a homemade thermometer with your kids using household items!

Materials

  • Mason jar with straw lid
  • Clear straw
  • Play dough or modeling clay
  • Water
  • Rubbing alcohol
  • Cooking oil (any kind)
  • Red (or other) food colouring

Directions

  • Add the food colouring, 1/4 cup water, 1/4 cup alcohol, and a tablespoon of oil into a mason jar and mix.
  • Stick the straw through the straw hole and tighten the lid onto the jar.
  • Mold a piece of play dough on the lid around the straw, which will hold the straw about half an inch from the bottom of the jar.
  • Place your DIY thermometer outside in the cold or in the fridge and inside the house and look at the difference in how high the liquid rises in the straw at different temperatures.

Spark Creative Learning!

Many commercial thermometers contain alcohol because alcohol has a low freezing point. As the temperature of the alcohol increases, it expands and causes the level within the thermometer to rise.

The level of the alcohol corresponds to the printed lines/numbers on a thermometer, indicating the temperature. This homemade version does something similar. However, with your homemade thermometer, you aren’t actually measuring temperature, just seeing temperature changes.

If you have a real thermometer, you can use it to make a scale on your homemade thermometer: let your bottle get to room temperature and then mark the straw with what the actual room temperature is. Then set the bottle in the sun or in the snow and do the same. Mark several different temperature levels and then watch your thermometer for a day and see how accurate it is.

ALL ABOARD: WE’RE GATHERING STEAM


Source: gosciencekids.com/magnetic-marble-run

Make a fun and simple fridge door magnet run with your family!

Materials

  • Cardboard tubes in different lengths & diameters (toilet paper rolls, paper towel rolls, foil/cling film rolls)
  • Washi tape or other decorative tape or stickers
  • Magnetic sheet
  • Scissors
  • Hot glue gun or strong glue
  • Various little balls (marbles, pom poms, etc.) to run through the track!

Directions

  • Decorate your cardboard tubes with washi tape or whatever you’d like! Stripes are simple to achieve and look great.
  • You can create some shape variations by cutting an angle in the end of some of the cylinders, or by cutting a small section out of the side of another. (These variations are great to have later, when the kids are trying out different marble run designs.)
  • Use hot glue (or other strong glue, and let them dry overnight) to attach magnets to the side of each tube. Stronger magnets are best, especially if you plan to use heavier balls like marbles or steel balls for your run. Weaker magnets work if you’re using pompoms.
  • Once you’re done creating and decorating your tubes, pop them on the fridge and wait for the kids to come and play!

Spark Creative Learning!

  • How many zigzags can you incorporate into your design?
  • Use a stopwatch to time your marble run. Can you modify your track to make it quicker? Slower?
  • Test your marble run using a heavier smooth ball (a marble) vs. a lighter, rough ball (a pompom). Do you need to modify your design to suit the ball type? How does the type of ball affect the speed?
  • How far does your ball roll when it comes out of the end of marble run? Can you modify your design to get the ball to land in a particular spot?

ALL ABOARD: WE’RE GATHERING STEAM

Discover Halifax Discovery Centre’s archive of Discovery@Home online learning experiments! Discovery@Home is a free online video series to connect students with science at a time when it is needed most. These hands-on, curriculum-connected workshops for grades P-9 will make science learning at home fun and easy. Watch Discovery@Home live, learn what materials you will need, submit questions or show off your work, and check out previous sessions in their archive.