ALL ABOARD: WE’RE GATHERING STEAM
Source: steampoweredfamily.com
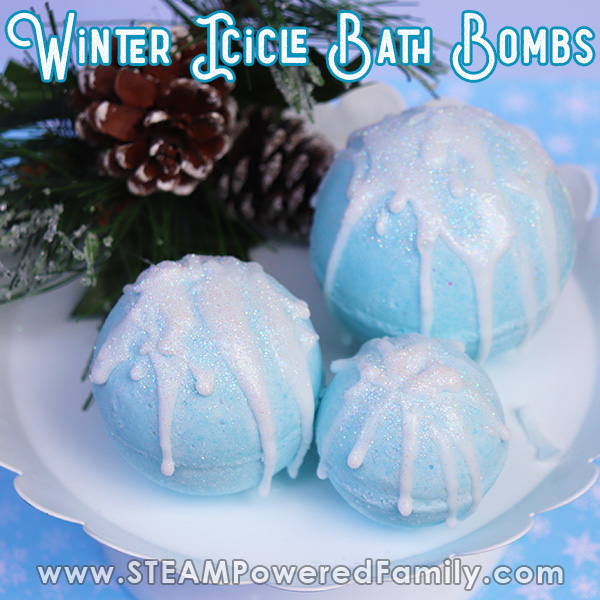
This bath bomb activity is meant to capture the sparkle of freshly-fallen winter snow. With this activity, kids can also study icicles and the way they look and reflect the light and see if they can think of ways to capture that feeling in the design of their bath bombs.
Materials
- 2 cups baking soda
- 1 cup citric acid
- 1/2 cup cornstarch
- 1/4 cup cream of tartar
- 1/4 cup fine Epsom salts
- 1/3 cup coconut oil
- 1 tablespoon polysorbate 80
- 10-20 drops helichrysum essential oil
- 10-20 drops lavender essential oil
- Light blue coloured mica powder
- Glitter
- Bath bomb molds
- 2-3 cubes of white melt-and-pour soap base
- Spray bottle filled with rubbing alcohol
- 1 large mixing bowl
- 1 small bowl
- Microwave safe measuring cup
- Spoon
Directions
- In a large mixing bowl, add the baking soda, citric acid, cornstarch, cream of tartar and Epsom salts. Mix dry ingredients together.
- In the measuring cup add the coconut oil. Heat in the microwave for a few seconds until it becomes a liquid.
- Once melted, add the polysorbate 80, helichrysum essential oil, lavender essential oil, glitter and mica colour powder. Mix together with a spoon, then add to the large mixing bowl.
- Mix all the ingredients together. I use my hands to break down any lumps and make sure everything is really mixed in there. The mixture is perfect when it holds together as you press it into your hands and feels like wet sand.
- Take one mold and fill each side with the mixture until it is overflowing a bit. Press both sides together, using a twisting/grinding motion to get rid of any excess mixture. Gently tap each side and carefully remove the bomb. (This takes some technique and practice. Be patient. You can repack and try again as often as you need to until you get the knack of it.)
- As you progress through making the bath bombs, you may need to spray the mix with rubbing alcohol to moisten it, so they continue to bind together.
- Allow the bath bombs to dry for a minimum of 24 hours. A rule of thumb is that when they are hard to the touch, they are ready for the final stage: the glaze!
- Place soap cubes into a microwave safe bowl and melt for 30 seconds and stir. Continue to melt in 30 second intervals until completely melted. You can add some glitter here or wait for the glazing stage.
- Using a condiment or hair colouring bottle or spoon, drizzle the soap over the bombs to give them the effect of icicles. If sprinkling the glitter, do it before the soap glaze hardens.
- Let set overnight before wrapping or packing in an airtight container.
- Give as gifts or keep for yourself!
Using Your Icicle Bath Bombs
To use, simply fill your bath with warm water and plop the bath bomb in! Enjoy the fizzy bath bomb fun! Bath bombs are best used within a couple of weeks. Overtime the strength of the reaction will diminish.
Bath bombs must stay dry until you are ready to use them. They can be wrapped in plastic or placed in an airtight container.
Spark Creative Learning!
Bath bombs are an acid-base chemical reaction. In this recipe we have baking soda as our base and citric acid and cream of tartar as our acids. Cornstarch is a fantastic filler that helps keep our acid and base ingredients dry. This is important, because as any young scientist will tell you, when acids and bases come together, they react, but not when they are in a dry solid state like our bath bombs. To trigger the chemical reaction we need water to make the magic happen.
Another ingredient you may not recognize from the list is polysorbate 80. This is an emulsifier that helps oils mix with water. This is very important in bath bombs, where you want the ingredients to mix in with the bathwater and not float on the top like a layer of scum and stick to the sides of the bathtub. Plus, the science of emulsifiers is pretty cool – finding a way to make fat and water mix is fascinating for young scientists.