ALL ABOARD: WE’RE GATHERING STEAM


Source: nationalgeographic.co.uk

Kids won’t need beakers and microscopes for these four biology experiments – they just need themselves! Each of these experiments from National Geographic’s UK website lets children discover how a human body system works. And by doing these “tests” on their own bodies, they’ll get to see and feel exactly how their own systems function. Learn more and start experimenting.

CREATION STATION: PAPER PLATE TIGER


Source: gluedtomycraftsblog.com

This paper plate tiger craft idea is super simple, inexpensive, and fun for all ages.

Materials

  • Large paper plate (one per tiger craft)
  • Orange tissue paper
  • Black/orange/white cardstock paper
  • School glue
  • Craft scissors
  • Black marker

Directions

  • First cut your tissue paper into small squares.
  • Put a good amount of glue all over the paper plate and have your child cover it completely with the orange tissue paper.
  • While they’re doing that, cut out some tiger facial features from your cardstock. Think eyes, ears, nose and small tiger stripes.
  • To finish your paper plate tiger, glue on all the cardstock features to the paper plate. Then allow it to dry completely before you display it proudly for all to see!

explore more:

Kids Playing

SHOP FEATURE 5

(For the week of January 17, 2022) Check out this week’s Feature 5 – a list of top-selling products from Shop, the Children’s Museum’s gift store, now with FREE shipping in Winnipeg on orders over $25! Read More… Sensory Bin – Construction Zone Price: $24.99 each Foster imaginative play with the Construction Zone Sensory Bin.…
Jan 18, 2022 • arts and crafts, creativity for kids, feature 5, Plush, science, shop, Shop Feature 5, Toys
Kids Playing

ALL ABOARD: WE’RE GATHERING STEAM

Source: scienceupfirst.com Thursday, January 27 is National Kids & Vaccines Day! The COVID-19 vaccines approved in Canada are safe, effective, and save lives. Let’s move the needle (pun intended) and promote vaccine confidence to protect the largest unvaccinated cohort of people in Canada: KIDS! Join ScienceUpFirst, Children’s Healthcare Canada, and the Sandbox Project with vaccine…
Jan 20, 2022 • COVID-19, French, French Science, science, STEAM, STEAM resources
Kids Playing

LOVE LOCAL: SPARK CREATIVE LEARNING ONLINE

Source: folklorama.ca In an effort to support the public health orders of the province of Manitoba for the public to stay home and stay safe, Folklorama is pleased to present Folklorama at Home: The Virtual Experience, on now weekly until March 2022. Folklorama’s cultural arts division has launched a series of free virtual programs that…
Jan 21, 2022 • Family fun, folklorama, french culture, french heritage, love local, online activity, Things to do in Manitoba, Things to do in Winnipeg

ALL ABOARD: WE’RE GATHERING STEAM


Source: mamapapabubba.com

This play dough subtraction smash activity is a fun visual and tactile way for little kids to start learning subtraction!

Materials

  • Play dough, in four or five different colours
  • Cardstock or blank flashcards
  • Scissors (if using cardstock)
  • Marker
  • Plastic tray

Directions

  • Using blank flashcards or cardstock cut into squares, write out some basic subtraction questions using a marker.
  • Then, using different colours of play dough, make a whole bunch of small-ish balls.
  • Set up the play dough balls and equation cards (face down) on a plastic tray.
  • Get your child to start by flipping over an equation card and reading the question on it. Then, they can take the corresponding number of play dough balls and arrange them near the card.
  • Then get your child to “smash” the number of balls needed to complete the equation. Afterward, your child can tell you how many un-smashed dough balls are remaining that now match the equation.
  • Repeat as much as you like!

CREATION STATION: NEWSPAPER POLAR BEAR CRAFT


Source: iheartcraftythings.com

Materials

  • Polar bear craft pattern (optional; available at this link)
  • Blue, white, and black cardstock
  • Newspaper
  • Googly eyes
  • Hole punch (optional)
  • Black marker
  • Scissors
  • Glue

Directions

  • Begin by cutting out several pieces from your newspaper to make your polar bear. Start with a large circle for the polar bear head and another half circle for the the polar body body. You will also need two ears and a circle or oval shape for the polar bear muzzle.
  • Cut out two half circles for the ears and an inverted triangle-shaped nose from black cardstock paper.
  • Tear a section off your white cardstock about one-third down the page. You will notice a textured section along the tear of the cardstock that gives great texture to your craft. Add glue to the back of the cardstock and glue it at the bottom of your blue cardstock. This piece will be the snowy background behind your polar bear. (Save the remaining piece of white cardstock to use in a different craft project in the future.)
  • Glue the polar body at the bottom of your page, on top of the snowy background. Then glue the black nose inside the muzzle and the black inside ear pieces onto the ears. Glue the muzzle on the polar bear face and the ears at the top of the polar bear face.
  • Glue the the polar bear face on top of the polar bear body. Now glue on the googly eyes.
  • Draw a mouth on your polar bear with your black marker.
  • Use your hole punch to punch out several white circles. Finish your newspaper polar bear craft by gluing the snowflake-like circles all around your polar bear. (NOTE: If the white circle punches seem daunting, you can also have kids print a fingerprint with white paint around their paper for snow. Using a white crayon to draw on snow is also another simple alternative.)

ALL ABOARD: WE’RE GATHERING STEAM


Source: Boston Children’s Musem

Check out the Boston Children’s Museum’s online archive of kid-geared activities on their website. They have a huge range of content, from crafts and art activities, to book recommendations and cultural history, to lessons about science and nature. For example, you can learn about the museum’s friendly python, Ollie, or watch a demonstration of icy winter experiments on their YouTube channel.

You can also sign up for their activities email list and get notified every week when they post fun content and activities you can work on at home with your kids, as well as well as informative articles and podcasts about play and learning at home during this time of social distancing.

CREATION STATION: PAPER EYEGLASSES CRAFT


Source: firstpalette.com

Print and craft a pair of cute paper eyeglasses using First Palette’s six fun-shaped eyeglasses templates. You can make regular-shaped eyeglasses, heart-shaped and star-shaped awesome glasses, sweet flower-shaped ones, and a pair of retro cat-eye glasses!

Materials

  • A4 or letter size cardstock
  • Cellophane paper or transparency film
  • Scissors
  • Glue
  • Crayons, coloured pencils, markers, glitter glue, washi tape, stickers, rhinestones, sequins, or whatever you want to decorate your specs

Directions

  • Choose and print out any of the glasses templates (linked here under step 1) on A4 or letter size cardstock.
  • If you chose any of the non-coloured templates, colour them with markers, crayons or coloured pencils. Use a single colour, or make it as colourful as you like. When using paint, add only a little water or none at all to prevent your paper eyeglasses from curling at the edges.
  • Cut out all three template pieces, and then cut out the eye holes.
  • The front frame has a pair of side tabs, each bordered by a dashed line. Fold the side tabs towards the back. Unfold.
  • Glue the straight end of each arm (the part that extends over the ears) onto a side tab.
  • Decorate your eyeglasses with stickers, glitter glue, small paper shapes, puffy paint, rhinestones, and other notions you want.
  • Make the lenses out of cellophane paper or transparency film. Cut a pair to a size and shape that covers each eye hole. Glue the lenses at the back of the frame.
  • Once the glue dries, try on your awesome new glasses.

explore more:

BOXING DAY AT HOME

Boxing Day

Though we’ll miss celebrating Boxing Day with you this year, here are some of our favourite family ideas for an extra special Boxing Day at home!

1. Bundle up and go for a winter walk.

Spending time outdoors is a great way to relax, re-energize, and reconnect with nature after a busy festive season. Not only is it good exercise, it’s also a lot of fun!

If you want to add a little variety to your regular neighborhood walk, here are 10 fun walk ideas for families.

2. Break out the board games for an afternoon (or evening!) of family games.

For many families, game night is a big tradition. That’s because it can be a great way to make memories in a manner that’s largely inexpensive, easy — and most importantly — fun.

Let each family member choose their favourite board game and then play each game in turn – or see this list of fun family game night ideas to help you out with your planning!

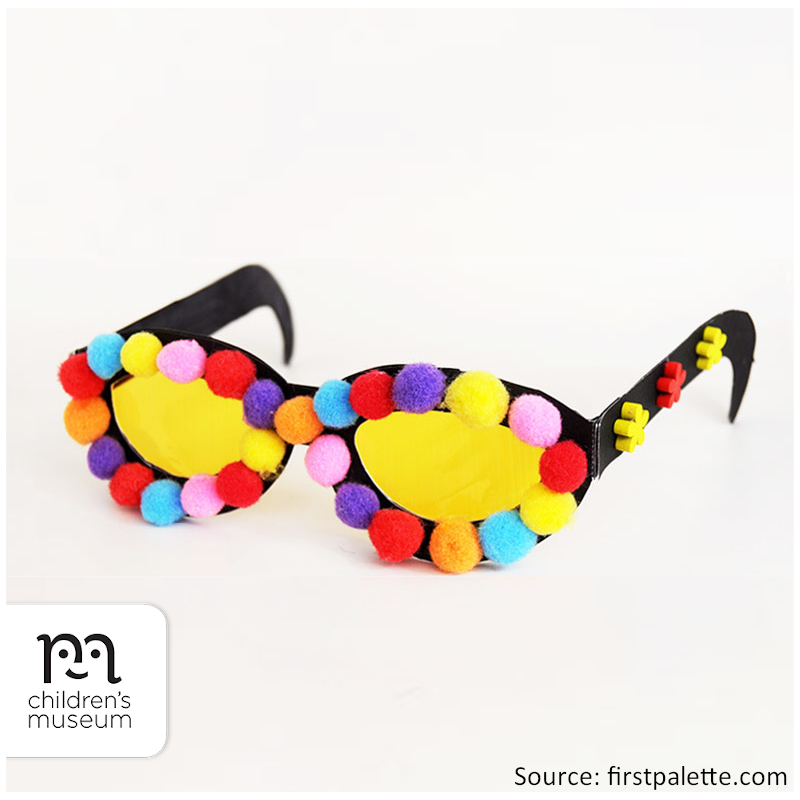
3. Get crafty with empty boxes and left-over gift wrap.

From Cardboard Skeeball and Cash Registers to Target Golf and Drive-In Movie Cars, a cardboard box can be anything you imagine it to be and more!

4. Watch a family-friendly boxset.

While limiting screen-time is normally a good thing, sometimes it can be fun to throw the rules out the window for one day. This Boxing Day, get cozy with some hot chocolate and leftover holiday snacks and tuck in with your loved ones for a family movie marathon. Bonus points awarded for festive movies titles, extra soft pillows, and snuggly duvets!

Looking for movie ideas? See Movie Marathon with Kids: Over 100 Movies for Families for tons of great themes and titles.

5. Learn something new.

The day after Christmas isn’t just a time for sitting around in your pyjamas and checking out all your presents. It’s a holiday of its own! But what is Boxing Day and what’s the history behind it?

Get the scoop on Boxing Day or explore more fun winter holiday facts at CBC Kids!

ALL ABOARD: WE’RE GATHERING STEAM


Source: steampoweredfamily.com

This bath bomb activity is meant to capture the sparkle of freshly-fallen winter snow. With this activity, kids can also study icicles and the way they look and reflect the light and see if they can think of ways to capture that feeling in the design of their bath bombs.

Materials

  • 2 cups baking soda
  • 1 cup citric acid
  • 1/2 cup cornstarch
  • 1/4 cup cream of tartar
  • 1/4 cup fine Epsom salts
  • 1/3 cup coconut oil
  • 1 tablespoon polysorbate 80
  • 10-20 drops helichrysum essential oil
  • 10-20 drops lavender essential oil
  • Light blue coloured mica powder
  • Glitter
  • Bath bomb molds
  • 2-3 cubes of white melt-and-pour soap base
  • Spray bottle filled with rubbing alcohol
  • 1 large mixing bowl
  • 1 small bowl
  • Microwave safe measuring cup
  • Spoon

Directions

  • In a large mixing bowl, add the baking soda, citric acid, cornstarch, cream of tartar and Epsom salts. Mix dry ingredients together.
  • In the measuring cup add the coconut oil. Heat in the microwave for a few seconds until it becomes a liquid.
  • Once melted, add the polysorbate 80, helichrysum essential oil, lavender essential oil, glitter and mica colour powder. Mix together with a spoon, then add to the large mixing bowl.
  • Mix all the ingredients together. I use my hands to break down any lumps and make sure everything is really mixed in there. The mixture is perfect when it holds together as you press it into your hands and feels like wet sand.
  • Take one mold and fill each side with the mixture until it is overflowing a bit. Press both sides together, using a twisting/grinding motion to get rid of any excess mixture. Gently tap each side and carefully remove the bomb. (This takes some technique and practice. Be patient. You can repack and try again as often as you need to until you get the knack of it.)
  • As you progress through making the bath bombs, you may need to spray the mix with rubbing alcohol to moisten it, so they continue to bind together.
  • Allow the bath bombs to dry for a minimum of 24 hours. A rule of thumb is that when they are hard to the touch, they are ready for the final stage: the glaze!
  • Place soap cubes into a microwave safe bowl and melt for 30 seconds and stir. Continue to melt in 30 second intervals until completely melted. You can add some glitter here or wait for the glazing stage.
  • Using a condiment or hair colouring bottle or spoon, drizzle the soap over the bombs to give them the effect of icicles. If sprinkling the glitter, do it before the soap glaze hardens.
  • Let set overnight before wrapping or packing in an airtight container.
  • Give as gifts or keep for yourself!

Using Your Icicle Bath Bombs

To use, simply fill your bath with warm water and plop the bath bomb in! Enjoy the fizzy bath bomb fun! Bath bombs are best used within a couple of weeks. Overtime the strength of the reaction will diminish.

Bath bombs must stay dry until you are ready to use them. They can be wrapped in plastic or placed in an airtight container.

Spark Creative Learning!

Bath bombs are an acid-base chemical reaction. In this recipe we have baking soda as our base and citric acid and cream of tartar as our acids. Cornstarch is a fantastic filler that helps keep our acid and base ingredients dry. This is important, because as any young scientist will tell you, when acids and bases come together, they react, but not when they are in a dry solid state like our bath bombs. To trigger the chemical reaction we need water to make the magic happen.

Another ingredient you may not recognize from the list is polysorbate 80. This is an emulsifier that helps oils mix with water. This is very important in bath bombs, where you want the ingredients to mix in with the bathwater and not float on the top like a layer of scum and stick to the sides of the bathtub. Plus, the science of emulsifiers is pretty cool – finding a way to make fat and water mix is fascinating for young scientists.

CREATION STATION: PAPER HEART PENGUIN


Source: craftymorning.com

This cute paper penguin has hearts for their feet, beak, and tummy!

Materials

  • Orange, black, and white construction paper
  • A pair of big googly eyes
  • Glue
  • Scissors

Directions

  • Cut a black oval out for the penguin body, one long white heart for the tummy, and three orange hearts. Two will be for the penguin’s feet and one for the beak (make that heart pointier at the bottom).
  • Glue the hearts onto the penguin’s body, starting with the large white heart.
  • Then add the big googly eyes to finish off your cute penguin art project!

ALL ABOARD: WE’RE GATHERING STEAM


Source: explorerfieldtrips.com

The iconic San Francisco science museum Exploratorium has a wonderfully resource-filled website that’s great for kids – and families – to discover. Over the years, Exploratorium has gathered and shared information from artists and scientists across the world, and their website is a treasure trove of inspiration.

They have tons of learning resources under subjects like Astronomy & Space Sciences, Engineering & Technology, Social Science, History, and more. Visitors can also browse by content type, such as activities, video posts, websites, and more. Get inspiration for a quick and simple activity with Science Snacks! Their 35,000+ pages of web content is a perfect place to start exploring the world through science, art, and human perception.