ALL ABOARD: WE’RE GATHERING STEAM


Source: 123homeschool4me.com

Have you ever wondered why leaves change colour in fall? This fun, engaging, and simple leaf science experiment is perfect for kids ages 4-10.

Materials

  • Mason or other glass jars
  • Coffee filters
  • Leaves
  • Rubbing alcohol
  • Notebook and pencil to record observations

Directions

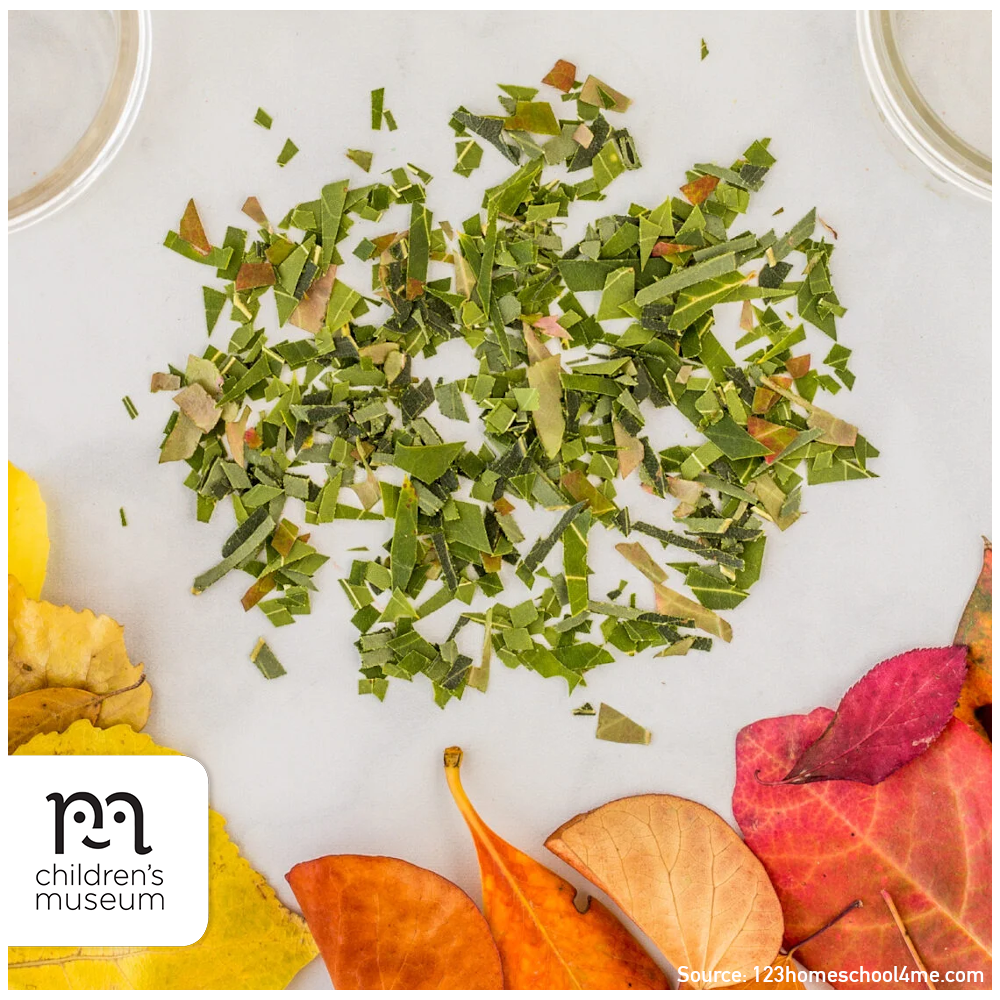
  • Collect a few handfuls of leaves. You can take a fun nature walk and enjoy collecting leaves on the way. Try to collect a variety of different-coloured leaves.
  • Sort the leaves into containers by colour. They also need to be ground up or torn into relatively small pieces.
  • Put each colour of leafy bits into a glass jar and cover the leaves with rubbing alcohol. The rubbing alcohol should start extracting colour from the leaves.
  • Make a cone shape with the coffee filters and place the pointed tip into the leaf and rubbing alcohol mixture, and allow it to sit long enough to absorb the liquid.
  • You should immediately be able to see the coffee filters absorb the liquid and take a closer look at the different colours. The coffee filters will keep absorbing the leaf-coloured alcohol and then drying out over the next 12 hours. You can describe or sketch the colours you see in a notebook.

Spark Creative Learning!

During winter, the days get shorter, affecting the amount of sunlight the leaves are exposed to. Due to this lack of sunlight, plants go into a resting state and live off of the glucose that they stored over the summer. As they shut down for the winter, the green chlorophyll disappears from the leaves. As the bright green fades away, you can begin to see yellow and orange colours. Small amounts of these colours have been in the leaves all along. For example, in maple trees the bright red that shows up in fall is a result of excess glucose being trapped in the leaves. Learn more.

ALL ABOARD: WE’RE GATHERING STEAM


Source: tinkerlab.com

In this yeast and sugar science project, you can watch yeast feed on sugar to fill a balloon with carbon dioxide gas. It’s a fun experiment for kids that’s made with household, everyday materials.

Materials

  • Sugar, 2 tablespoons
  • Active dry yeast, 1 packet or 2 1/4 tablespoons
  • Balloon
  • Warm water (40.5-46 degrees C)
  • Mixing bowl and funnel
  • Bottle that you can fit a balloon over

Directions

  • Mix the yeast and sugar into the warm water and stir.
  • Once it all dissolves, pour the mixture into the bottle and cover the bottle with the balloon.
  • After a few minutes you’ll be amazed by the balloon filling with gas!
  • Once the bottle fills up with bubbles, you can the whole yeast sugar experiment to the sink.

Spark Creative Learning!

As the yeast feeds on the sugar, it produces carbon dioxide. With no place to go but up, this gas slowly fills the balloon. A very similar process happens as bread rises. Carbon dioxide from yeast fills thousands of balloon-like bubbles in the dough. Once the bread has baked, this is what gives the loaf its bubbly, airy texture.

ALL ABOARD: WE’RE GATHERING STEAM


Source: steamexperiments.com

This demonstration gives the illusion of mind reading using properties of odd and even numbers!

Materials

  • Sticky note pad
  • Pencil or pen

Directions

  • Display the set up to the participant/s with the sticky notes all of a single colour in a 3×3 square and explain to them the setup.
  • Explain that they will be starting from the top left-hand sticky note, and you, the instructor, will be counting up incrementally out loud. With each step counted, the participant/s will move from one sticky note to the next in their minds horizontally or vertically but NOT diagonally. It is important that the participant/s do not disclose which sticky note they are on.
  • Then, you as the demonstrator shall remove one sticky note at a time, and will eventually guess their location by narrowing their position down to 1 remaining sticky note.
  • Begin the demonstration, and by implementing the trick, remove sticky notes with every count.
  • Repeat this until you have narrowed down the participant/s to a single sticky note.
  • Ask the participant/s whether they can guess how you have done it.
  • Allow them to observe the set-up and see if they notice what the trick is.

Spark Creative Learning!

At no time will the demonstrator know where the participants are on the 3×3 square of sticky notes. Here’s the trick: the 3×3 sticky notes can be visualized in the mind of the demonstrator as having alternating colours – similar to a chessboard. Since the participants can only move in lateral directions if they were to move an even number of moves they don’t change colour. But were they to move an odd number of moves, they would change coloured squares. With this fact, the demonstrator may remove squares one a time that they know the participants are not on until 1 square remains.

ALL ABOARD: WE’RE GATHERING STEAM


Source: howtosmile

If you’re looking for new ways to teach kids about math and science, howtosmile is the place to discover them. Their website offers an ever-growing archive of activities that meet you where you live, whether your “classroom” is an active volcano, the shark tank at the local aquarium, or your own kitchen table. Check out their content, including curated topics page or explore their latest blog posts.

howtosmile is a collection of the best educational materials on the web, in addition to learning tools and services, all designed especially for those who teach school-aged kids in non-classroom settings. It was launched in 2010 by a group of science museums – Lawrence Hall of Science, the Exploratorium, the Science Museum of Minnesota, the Children’s Museum of Houston, and the New York Hall of Science – dedicated to bringing science, technology, engineering, and math (STEM) out of the academic cloister and into the wider world.

ALL ABOARD: WE’RE GATHERING STEAM


Source: gosciencekids.com

Exploring magical drawings with light refraction is a fun ‘magic’ science trick that even little kids can do. This science experiment is easy to do almost anywhere!

Materials

  • Glass of water
  • Paper (or paper napkin works if you’re at a restaurant)
  • Pen or marker

Directions

  • Draw something on a piece of paper, and see how it looks when you look through a glass of water. You don’t have to limit it to arrows. Be creative! You can draw anything you like and see how it looks through the glass.
  • Questions to ponder: How does your picture change? What bits stay the same? Does image size matter? What happens if you try with a wider (or narrower) glass? What happens if you move the glass closer to the image? Or further away? You could use a ruler to measure the distances and record your results. Does it change if you look at it straight on or slightly from the side?
  • A fun idea is to draw a picture of a face, with the eyes looking one way, and see which way the eyes are looking when you look through the glass.

ALL ABOARD: WE’RE GATHERING STEAM


Source: Girls Who Code

Girls Who Code offers a huge archive of Code At Home activities for kids to discover. Create a public service announcement to stand up for mother nature, learn digital art, play a game where you create and catch a meteor, go through their step-by-step activist toolkit series, learn the text-based language Python, and much more! Each activity features a woman in tech who pioneered innovative technology. Learn more.

ALL ABOARD: WE’RE GATHERING STEAM


Source: rhythmsofplay.com

Making shadow sidewalk chalk art is a fun way to get kids outside learning and flexing their creative muscles while having fun creating art outdoors.

Shadow art outdoor science is a hands-on STEAM activity that will help children learn about shadow science and that shadows are formed when an object blocks light.

Materials

  • A sunny day
  • An open space with no shadows and no clouds overhead. Driveways, parking lots, and playgrounds work well.
  • Recycled chalk paint (making recycled chalk paint is another great way for kids to explore science)
  • Sidewalk chalk
  • Paintbrushes
  • Camera (optional)

Directions

  • Create shadows outside using the sun as the source of light. Invite children to experiment and play around with creating different types of shadows outside. Encourage kids to use their bodies and other objects such as leaves, toys, bikes, etc. to block the sunlight and create shadows on the ground.
  • Trace shadows. Use sidewalk chalk to trace shadows in various positions. Trace the shadows of human bodies, animal bodies, and objects to make shadow sidewalk art. Trees, flowers, and children’s toys are a few more fun shadow sidewalk art ideas you can try.
  • Use recycled chalk paint, sidewalk chalk paint, or sidewalk chalk to ‘fill in’ or ‘colour’ your shadows to create your shadow sidewalk chalk art.
  • Sidewalk chalk art doesn’t last long – make sure that you take pictures of your beautiful shadow art creations!

Spark Creative Learning!

Once children are finished painting shadow sidewalk chalk art, consider asking them a few questions to solidify the simple science concepts that they learned about:

  • How do shadows form?
  • How do shadows form outside?
  • What light source did we use to make shadows?
  • How did you block the light?
  • What happens when you block the light of the sun?

explore more:

ALL ABOARD: WE’RE GATHERING STEAM


Source: nypl.org

The New York Public Library offers lots of ways for you to explore STEAM concepts and develop your skills! By having fun with STEAM activities and programs, you’ll learn concepts and gain skills that can set you up for creative, scientific, and collaborative thinking now and in the future. 

Access the New York Public Library’s archive of weekly steam projects on their Vimeo channel, and check out their upcoming virtual programming schedule.

ALL ABOARD: WE’RE GATHERING STEAM


Source: littleinventors.org/resources

If you are a teacher wanting something fun and rewarding to inspire your students, or a parent looking for a creative activity for a rainy day, the website Little Inventors has everything you need to embrace the spirit of imagination and support your students (or kids) in coming up with marvelous, ingenious, bonkers invention ideas!

Little Inventors provides free curriculum-linked resource packs, personal inventors’ logs, and mini-challenges to help you bring creativity into your home or classroom. Learn more.

ALL ABOARD: WE’RE GATHERING STEAM


Source: 17apart.com

Regrow your own celery in a sunny window this spring!

Simply chop the base from a bunch of celery, leaving about 2 inches. Place this 2-inch cutting in a dish of water in a sunny location. You’ll have to wait for about 5-7 days to see new growth starting from the centre of the cutting.

After about a week or two, you can transplant the cutting to a pot with soil, burying the cutting in soil and leaving any new leafy growth in the centre to peek above the soil. Give it plenty of water and monitor it for signs of dryness or excess moisture.

The leafy centre will continue growing and start producing its own stalks, which you can start harvesting and snacking on!

Tips for growing and harvesting celery:

  • Celery does not grow well in hot conditions, so make sure you give your celery plant adequate water and shade during the hottest part of the day. If your plant does not receive enough water, it could become tough and stringy.
  • Change out the water every couple of days while in the initial water dish phase of the project.
  • When transplanting, you can also plant the celery directly into the soil outside – you may want to go this route if you live in a temperate area or want to be able to harvest outdoors.
  • You can remove only a few stalks of celery at a time – there’s no need to harvest the whole plant. When doing this, make sure you remove the outer stalks first and let the less developed inner stalks continue growing. Take care not to damage the rest of the plant if removing individual stalks.