ALL ABOARD: WE’RE GATHERING STEAM

This week’s topic is MATH. Make math fun (and tasty) with this marshmallow counting activity.

You’ll need the following:

  • Pictures of mugs (or actual mugs)
  • A marker
  • Marshmallows

Instructions

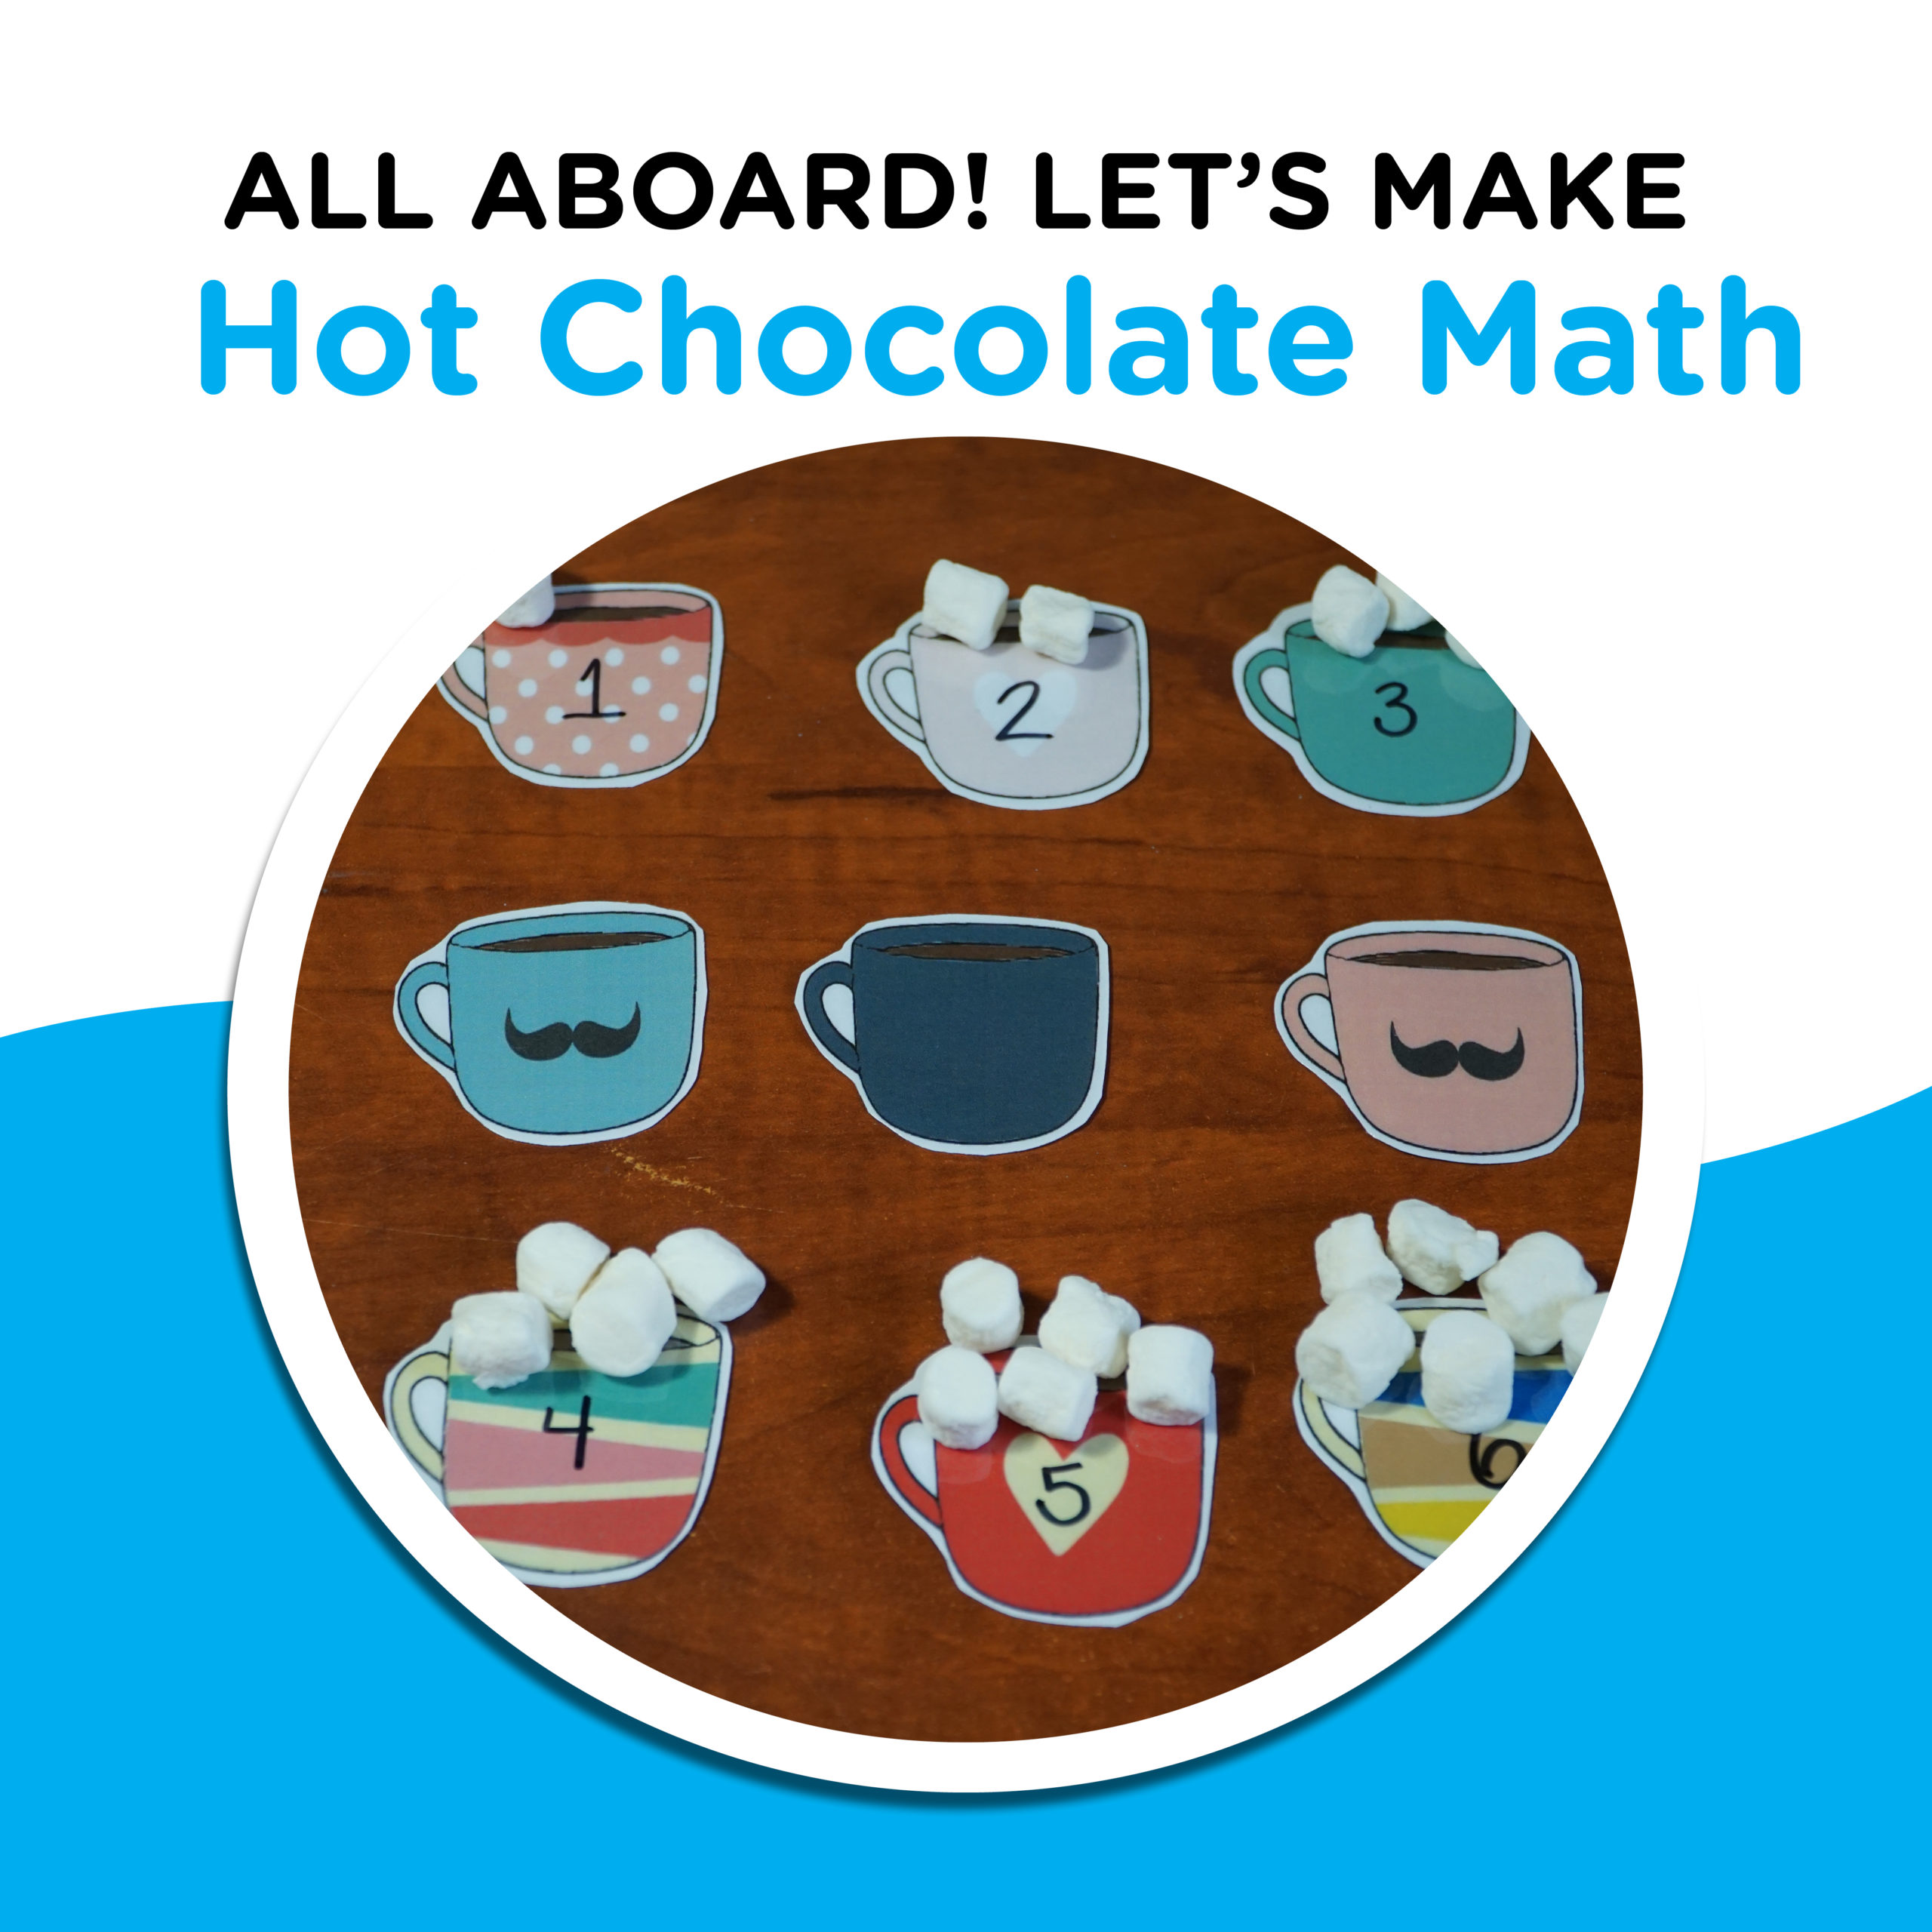
  1. Lay out pictures of hot chocolate mugs
  2. Write numbers on them with your marker
  3. Ask your child to match the same number of marshmallows to the number on the mug
  4. If they answer correctly, they can eat them as a bonus treat!

Learning how to count can be difficult for children. This homemade counting activity can make it fun! Children will learn how to match numbers and count out the correct number. Motivating them with a game is a good way to start learning about math.

ALL ABOARD: WE’RE GATHERING STEAM

Snow, snow, snow. Let’s turn this snow into something fun and make ice marbles! These are not only fun to make, but also a pretty lawn decoration.

You’ll need the following:

  • Balloons
  • Food colouring
  • Water
  • A freezer
  • Scissors

Instructions

  1. Place a few droplets of food colouring into your balloon
  2. Fill balloon with water and tie the end
  3. Place outside (if cold enough), or in the freezer for 24 hours
  4. Use scissors to cut the end off the balloon and peel away
  5. Place outside for pretty lawn décor

Ice marbles are a simple activity for children but create an interesting display for your yard. Children can make them into a pattern or build a mini structure out of them too.

ALL ABOARD: WE’RE GATHERING STEAM

This week’s area of focus is SCIENCE, we will make snow dough and discover the properties of oil and what happens when it’s mixed with cornstarch.

You’ll need the following:

  • 2 cups cornstarch
  • ½ cup vegetable oil
  • Glitter (optional)
  • Container
  • Mixing spoon
  • Snow accessories
  • Bin

Instructions

  1. Measure out 2 cups of cornstarch and pour it into a container
  2. Measure out ½ cup of vegetable oil and add it to the cornstarch
  3. Add in the optional glitter to make your snow sparkle
  4. Mix until the consistency resembles flaky snow that can stick together
  5. Place snow dough in a bin and add in accessories to manipulate the dough (scoops, snowman accessories, penguins, bears, trees etc.)

Children can start to learn about scientific terms such as properties, variables, constants, and viscosity. Ask them questions like, “how does the liquid move?” “what does it look like, smell like?” Discussing these terms will help prepare your child for the world of Science, and it’s fun too!

ALL ABOARD: WE’RE GATHERING STEAM

This week’s area of focus is MATH, we are teaching basic math skills with a useful visual. For this activity, your child will learn how to count, add and subtract, by using a helping hand!

You’ll need:

  • A rubber glove
  • Beans or other small items
  • Elastic band
  • Whiteboard/chalkboard or paper
  • Markers/chalk or crayons

The first step is to fill your rubber glove with beans. You don’t want to fill it too much or the fingers will not bend easily. Wrap the elastic band on the wrist end of the glove to close it up tightly. Now place the new hand on a whiteboard and add in plus and minus signs in between the fingers.

You can start by folding down one of the fingers and having your child add (or subtract) the remaining fingers together.

This activity is designed to help your child with adding and subtracting numbers together. Children often use their fingers to count, so why not give them an extra hand to do it!


If you try this with the children in your life, remember to share your creations with us on social media @childmuseumwpg

ALL ABOARD: WE’RE GATHERING STEAM

This week’s area of focus is ART, we are making mashed-up monsters with play dough. For this activity, your child will get to use their creativity by creating their very own pet monster.

You’ll need:

This activity is simple but will get your child’s imagination working double time with this fun monster creation!

Decide what type of monster you are creating and get to work…. there are no specific instructions, we want your child to have creative freedom. We do encourage them to mash up their play dough first (hence the monster MASH part), but they can roll it out and use a cookie cutter for the monster’s outline too.

Decorating their monster is the best part! Use the google eyes, pipe cleaners and various other supplies you gathered to decorate your monster however you choose.

This activity is designed to get your child to use their imagination to create their very own monster buddy. What type of monster is it? Does it have any superpowers? We want your child to explore their creativity and come up with whatever weird and crazy-looking creature they can think of!


If you try this with the children in your life, remember to share your creations with us on social media @childmuseumwpg

ALL ABOARD: WE’RE GATHERING STEAM

This week’s area of focus is ENGINEERING and we’re learning how to make our very own catapult!

For this activity, your child will learn about how a catapult is built and by checking various angles they can see if it affects how far something (we used toy bug) will fly!

You’ll need:

  • 8 Popsicle sticks
  • Elastic bands or pipe cleaners
  • Bottle cap
  • Glue
  • Toy bugs

Take two popsicle sticks and lay them on top of each other. Use a pipe cleaner and wrap it around one end. Now, stack the other six popsicle sticks together and tie both ends to hold the sticks altogether. Now, wedge the two-stick stack between the six-stick stack.  A more detailed outline and picture reference may be found here. 

This catapult will keep your child entertained and teach them about how catapults use stored energy to throw an object. The energy comes from building a gadget (catapult in our case) that uses tension, torque, and gravity!


If you try this with the children in your life, remember to share your creations with us on social media @childmuseumwpg

Source and photo: STEAMsational.com

ALL ABOARD: WE’RE GATHERING STEAM

This week’s area of focus is SCIENCE, and in the spirit of spooky season, we’re making a witches’ potion! In this experiment, your child will learn about density, why some substances do not mix, and they’ll enjoy a chemical reaction right before their eyes!

You’ll need:

  • Alka seltzer tablets
  • Oil
  • A glass jar
  • Water
  • Food colouring
  • Water

First, fill your glass jar 2/3 full of oil. Next, fill the rest of your jar with water. Now it’s time to add in your food colouring, you can add a variety of colours or keep it simple with just one. You will want to put a good amount in to see the differences in density. Break up 2 Alka seltzer tablets and add them to the jar. Observe as the Alka seltzer tablets create a gas and make a bubbling reaction!

Food for thought:

Why don’t all liquids just mix together? Some liquids are heavier than others, which is why the liquids separate, making a density tower.

This experiment also includes a chemical reaction. The Alka seltzer tablets create carbon dioxide, and when it is combined with water, it bubbles. The bubbles – holding the food colouring you added – reach the top of the jar, pop, and then sink back down to the bottom.


If you try this with the children in your life, remember to share your creations with us on social media @childmuseumwpg

 
Source: Little Bins For Little Hands

ALL ABOARD: WE’RE GATHERING STEAM

Here is a game that will help to teach your child about counting and making predictions. Before we start, which colour apple do you think will win the race?

You’ll need:

  • Apple Race printout
  • Paper Clip
  • Fastener
  • Pom Poms or play dough (yellow, green and red). These will be your apples.

Instructions:

Once you have your apple race printout, put the fastener through the paper clip, and push the pin through the apple pie chart. This will be your spinner. Then let the race begin. Have your child predict which colour apple will win. Take turns spinning the paper clip and add the matching coloured apple to the board. Whichever colour reaches the end first wins!

This game is easy to create and helps your child learn math concepts like prediction, counting and addition… with some fun too! 


Remember to share your creations with us on social media @childmuseumwpg

ALL ABOARD: WE’RE GATHERING STEAM

It’s a new school year, which means a new school photo! Have your child paint and decorate this adorable school bus picture frame made from popsicle sticks to display their picture in. 

You’ll need:

  • Tacky glue
  • Popsicle sticks 
  • Paints (yellow, grey, black)
  • Paintbrush
  • Buttons or gems
  • Paper

Instructions 

  1. Start by gluing two popsicle sticks together side by side.
  2. Now glue a popsicle stick on either side of your two sticks, vertically. 
  3. About an inch from the bottom of the two vertical sticks, glue three more popsicle sticks on horizontally together. 
  4. Paint your bus. Let it dry 
  5. Add in your decorations: gems or buttons for the lights and paper for the license plate.

This school bus craft is such a cute way for your child to show off their new school photo and get excited for picture day. You can add magnets to the back to put on the fridge for an extra touch.


If you give this a try, please share your creations with us. Tag us on social media @childmuseumwpg. 

ALL ABOARD: WE’RE GATHERING STEAM

Teachers love apples, and kids love slime! Learn about the chemical bonds that form when you mix glue and the activator together.

You’ll need:

  • 2/3 cup Elmer’s Glue
  • ½ tsp baking soda
  • ¼ cup water
  • 5 TBSP contact solution
  • Apple essential oil (if you want it to smell yummy)
  • Red food colouring
  • Bowl
  • Spoon
  • Gloves (if desired)

Instructions

  • Add glue to your bowl
  • Add water and baking soda, mix
  • Add food colouring (and essential oil if you like), mix
  • Add the contact solution (this is your activator)
  • Mix and knead until combined.

Slime is so much fun to play with, but it is also scientifically cool!

Why is slime a chemical reaction?

Polyvinyl alcohol can be found in simple PVA glue and borate ion is created when baking soda and contact solution are mixed. Once these household ingredients are mixed, they cannot be changed back, making it a chemical reaction!


If you try this slimy fun at home, don’t forget to share your creation with us on social media @childmuseumwpg