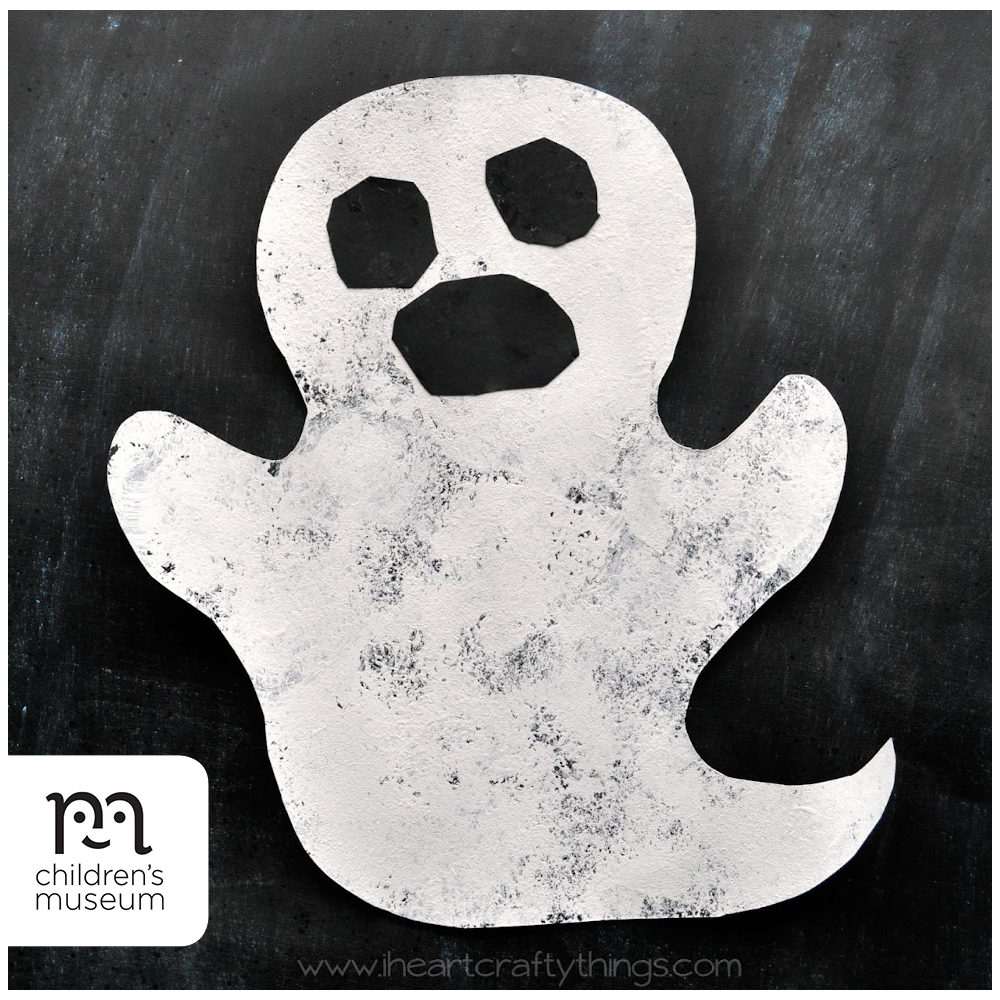
CREATION STATION: SPONGE-PAINTED GHOST
Source: Cooking with Ruthie/I Heart Crafty Things
Enjoy this simple sponge-painted ghost craft that young kids will not only have fun creating, but it can add to any spooky home decor as well.
Materials
- Black 12 x 12 cardstock paper
- White paint
- Small sponge
- Paper plate (to pour your paint on)
- Scissors
- Glue stick
- Hole punch (optional)
- White string (optional)
Directions
- Start by cutting a ghost shape out of your 12 x 12 black cardstock paper. You can use a pencil to draw the ghost first and then cut it out. Save the scraps from cutting out your ghost – you will use them in a minute.
- Pour white paint onto your paper plate. Dab your sponge into the paint several times to coat it all over and then dab it onto your ghost shape. It’s okay for some of the black to show through – it’s supposed to look that way to give it more of a translucent ghost appearance. Continue dabbing into the white paint and then onto your ghost until it is covered. Set it aside to dry completely.
- While your ghost is drying, use the black scraps left over from cutting out your ghost to cut out eyes and a mouth for your ghost. You can trace them out beforehand or cut freehand.
- When your ghost is finished drying, glue your eyes and mouth onto it.
- To turn your ghost into spooky Halloween decor, punch a hole at the top of it and tie some white string to it. Hang it from a mantle or a chandelier or any place you can think of to frighten (and charm!) your guests.